Create AI-generated headshots for business cards (2025)
Create AI-generated headshots for business cards (2025)
You probably have a LinkedIn-ready photo, but your printed business card still shows an old, blurry, or badly cropped image—or no photo at all. Hiring a photographer just to fix this feels overkill, and selfie-style pictures usually look unprofessional once they’re printed.
Here’s how to fix that.
This guide shows you exactly how to create a professional AI-generated headshot that’s optimized for business cards in 2025: correct sizes, cropping, background choices, and how to go from selfie → AI professional headshot → print‑ready card using HeadshotVIP and your favorite design/printing service.

Why AI-generated headshots are perfect for business cards
Most AI headshot content online focuses on LinkedIn, resumes, or dating profiles. But a business card has different constraints:
- Tiny print size
- Limited space for text
- Need for clear recognition at a glance
Based on how tools like Canva, Aragon, and others are used today, three themes stand out that matter even more for business cards:
Clarity at small sizes
On a business card, your headshot often prints at 18–30 mm (0.7–1.2 in) wide. Any blur, harsh filter, or “AI plastic skin” effect becomes very obvious.Simple, brand-aligned backgrounds
Busy or trendy AI backgrounds that look good on Instagram can turn into a noisy blob in print. Solid or subtle gradient backgrounds aligned with your brand colors work best.Consistent look for teams
If you’re a small business or startup, mismatched team cards (different lighting, pose, and crop) look amateur. AI makes it cheap and fast to generate consistent, studio-style portraits.
AI tools like Canva and Aragon are great at turning selfies into polished portraits. This article goes one step further and shows you the end-to-end workflow specifically for business cards, from camera to print.
Get the basics right: headshot specs for business cards
Before generating anything with AI, you need to know what you’re designing for.
1. Business card and headshot sizes
Most cards follow a standard size:
- US / Canada: 3.5 x 2 inches (89 x 51 mm)
- Europe: 85 x 55 mm
- Common design resolution: 300 dpi (print standard)
At 300 dpi, a US business card is:
- 1050 x 600 px (or close to it)
A typical headshot on a card:
- Width: 200–400 px (0.7–1.3 in on print)
- Aspect ratio: 1:1 (square) or 4:5/5:7 vertical
- Position: Usually left or right side, above or beside your name & title
For best flexibility, generate your AI professional headshot at:
- Minimum: 1200 x 1200 px (square)
- Ideal: 2000 px on the shortest side, 300 dpi
HeadshotVIP and other AI tools typically generate high‑resolution images that you can safely scale down without losing sharpness.
2. Composition rules that work in print
For business cards, treat your AI-generated headshot like a mini billboard:
Head and shoulders crop
Avoid full-body or large empty background. Your face should fill 60–70% of the width.Neutral or slight smile
Works best across industries—from corporate to creative.Eyes near the upper third
Classic portrait rule. When the image is tiny, this keeps your face immediately recognizable.Simple backgrounds
- Solid light gray, off‑white, or soft gradient
- A blurred office or neutral environment
Avoid super dark or super saturated backgrounds—they can print muddy or “heavy.”
3. Branding and color consistency
If your brand uses specific colors or a style guide:
Match background color to:
- Your brand primary/secondary color, or
- A neutral that complements your logo
Keep outfit style consistent:
- Founders and team: similar smart‑casual or formal level
- Real estate / consulting: more formal (jacket, collared shirt)
- Creatives / freelancers: smart but relaxed (no loud patterns; small prints are risky in print)
HeadshotVIP offers multiple business-focused styles (corporate, startup, executive, creative). Pick the one closest to how you actually show up with clients.
Workflow: create AI-generated headshots for business cards with HeadshotVIP
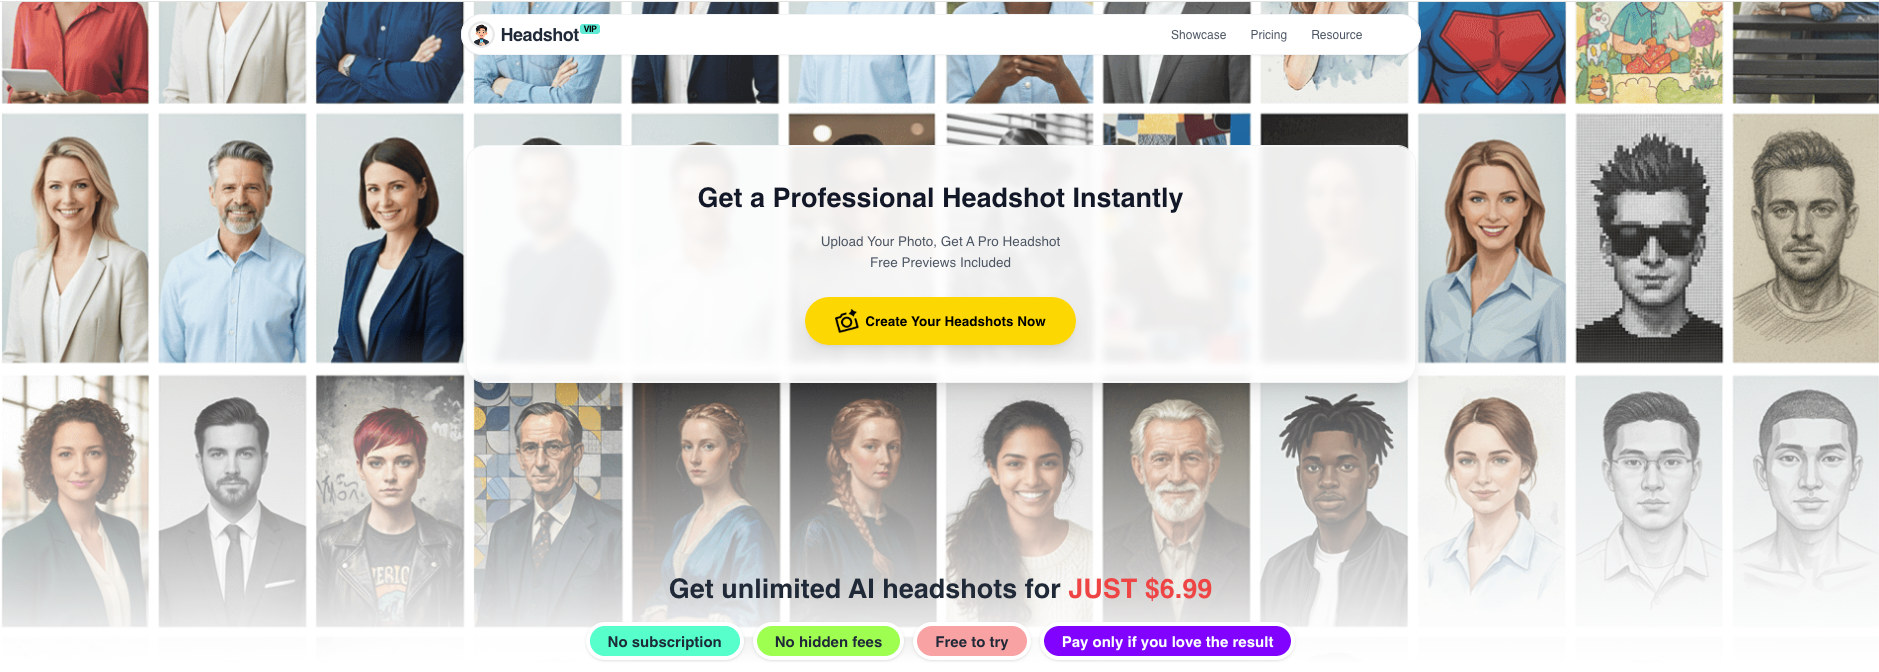
Method 1: Using HeadshotVIP (Recommended)
Use case:
Professionals, freelancers, and small teams who want fast, consistent, and print‑ready AI headshots for business cards, LinkedIn, and websites—without hiring a photographer.
Alt: AI-generated professional headshot from HeadshotVIP for business card design
Step-by-step: selfie → AI headshot → print-ready business card
Step 1: Prepare a few solid source photos
AI tools work best with good input. For HeadshotVIP:
Use 6–10 photos with:
- Good, even lighting (window light is perfect)
- No heavy shadows or harsh backlight
- Your face fully visible (no sunglasses, big hats, or hands blocking the face)
- Mix of:
- Straight-on and slight angle shots
- Different backgrounds
- Natural expressions
Avoid:
- Low‑resolution images (screenshots of screenshots)
- Filter-heavy selfies (beauty filters, extreme color grading)
The better your source photos, the more natural your AI professional headshot will look.
Step 2: Generate your AI headshots in HeadshotVIP
- Go to HeadshotVIP.
- Choose a plan:
- Starter for 1–2 personal headshots
- Professional if you want multiple styles/resolutions
- Team / Business for consistent team headshots
- Upload your selected selfies.
- Choose a business style:
- Corporate / executive
- Startup / casual-professional
- Creative pro
- Select:
- Background preference (neutral, office, color tone)
- Outfit style if available (suit, blazer, smart casual)
- Start generation and wait for results (usually minutes, depending on load).
HeadshotVIP uses identity consistency modeling to keep your facial features realistic and consistent across styles and poses.
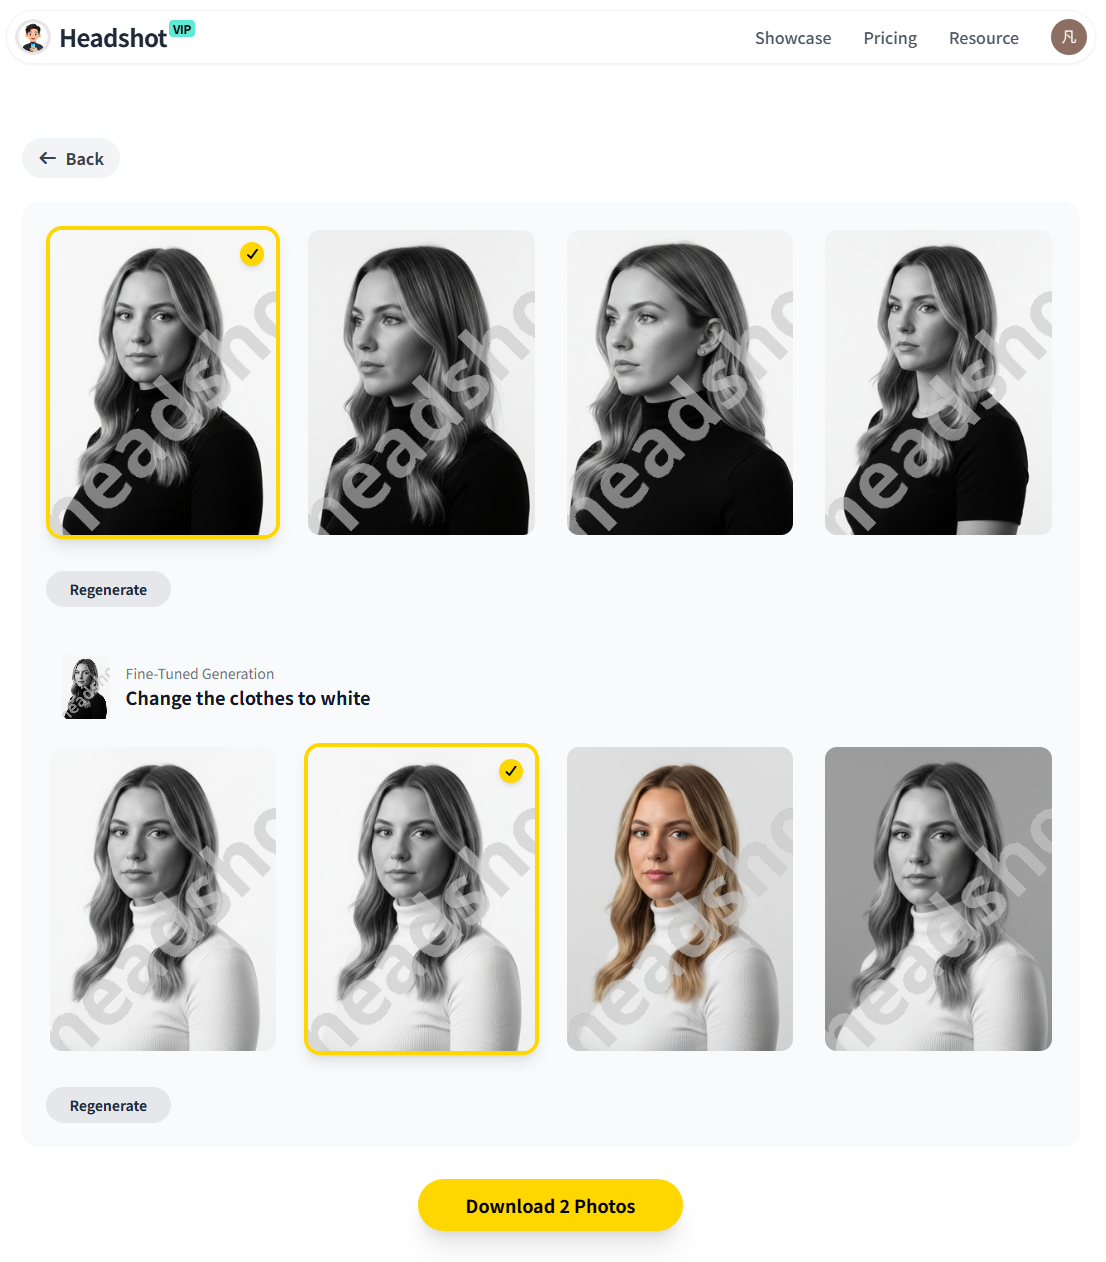
Step 3: Pick the best image for a business card
You’ll usually get dozens of AI professional headshots. For business cards, filter using these criteria:
- Face clarity: Zoom to 100%. Look for sharp eyes, natural skin texture (not overly plastic), and clear edges.
- Crop & pose:
- Head and shoulders
- No extreme tilt or dramatic angles
- Minimal hands or props
- Expression:
- Relaxed jaw
- Soft smile
- Eyes looking near the camera
- Background:
- Simple, low‑contrast
- Not too dark
- No strong objects or patterns close to your head
Download your top 1–3 favorites at full resolution. You’ll use one for your card, and keep backups for LinkedIn or other platforms.
Step 4: Adjust crop & resolution for business cards
Use your favorite design or image editing tool (Figma, Photoshop, Canva, etc.):
Create a new image:
- 1200 x 1200 px or similar
- 300 dpi if the tool supports it
Import your chosen HeadshotVIP image.
Crop it:
- Square (1:1) is easiest for most business card layouts.
- Place the eyes in the upper third.
- Make sure:
- Top of the head is visible or very slightly cropped.
- Shoulders are included for context.
Export:
- Format: PNG or high-quality JPG
- Resolution: keep original or at least 1000 x 1000 px
Now you have a clean, print-ready AI professional headshot you can drop into any card template.
Step 5: Design your business card with the new headshot
Use a card design tool or template (Canva, Figma, Adobe Express, or a printer’s template):
Set card size (e.g., 3.5 x 2 in, 300 dpi).
Place your photo:
- Size: around 0.8–1.2 in wide (240–360 px at 300 dpi).
- Position:
- Left with text on the right, or
- Top with text below.
Add:
- Name
- Title
- Company name
- Website
- Email and/or phone
- QR code (optional) linking to your LinkedIn or website
Make sure:
- Sufficient whitespace around your photo
- Text contrast is strong (dark text on light background or vice versa)
- No important elements are too close to trim edges (respect bleed/safe margins recommended by your printer)
Step 6: Export and test before printing
Export your business card as PDF (print) or high-resolution PNG/JPG per your printer’s guidelines.
Print a test copy on a home printer or as a single sample:
- Check the headshot:
- Is your face still clearly visible?
- Any weird color shifts? (Skin too red/orange/gray?)
- Check overall balance:
- Photo not too big or too small
- Text remains readable
- Check the headshot:
Adjust if needed:
- Slightly increase/decrease photo size
- Tweak brightness/contrast
- Change background color if it prints too dark
Once you’re happy, send the final file to your preferred printing service.
Why use HeadshotVIP for business card headshots?
Advantages:
✅ Business-focused styles
HeadshotVIP is built around LinkedIn, resumes, and professional branding, so results tend to look like real studio portraits—not fantasy art.✅ High-resolution, print-friendly outputs
Images are large enough for both digital use and high‑quality print, critical for sharp business cards.✅ Consistent look for teams
Style-consistent batch generation means your entire team’s cards can share the same visual tone—huge plus for brand professionalism.✅ Fast, simple workflow
Upload selfies → pick styles → download. No need to understand complex photo editing.✅ Privacy-focused
Photos are processed with security in mind, and images aren’t used to train general models without permission.
Limitations (to be aware of):
- Final result quality still depends on your original selfies (lighting, focus, and framing).
- Pose and micro-adjustments are more limited than a traditional photographer giving real-time direction.
- For highly niche brand concepts or extreme creative layouts, you might still need a designer’s help.
Alt: HeadshotVIP AI business headshot generation interface with style and background selection
Method 2: Using general AI design tools (like Canva or other generators)
You can also create an AI virtual headshot for your business card using broader tools such as Canva’s AI headshot feature or standalone generators like Aragon.
How this usually works
- Upload a selfie to the chosen tool.
- Select a “professional” or “business” style.
- Let the tool generate multiple AI headshots.
- Download your favorite and import it into a business card template (e.g., Canva has many).
This can work well, especially if you’re already designing your card in Canva. Their integrated AI headshot + card template flow is convenient.
Pros and cons vs. HeadshotVIP
Pros:
All-in-one design environment
Tools like Canva let you edit the headshot and design the business card in the same place.Templates galore
Quick access to thousands of business card layouts and print integrations.Low or free tiers available
Can be a budget-friendly option for basic needs.
Cons (where HeadshotVIP shines):
Less specialized for business headshots
Many AI generators are designed for general creative photos, not strictly professional portraits. This can lead to:- Overly smoothed, “fake” skin
- Unrealistic lighting
- Inconsistent likeness across images
Team consistency is harder
Getting a matching “studio” feel for multiple people’s cards can take a lot of manual tweaking.Privacy & data use policies vary
Some broad platforms may use uploads for broader AI training by default; always check their privacy policy.
If your main goal is one or two quick headshots and you already live in Canva, these tools can work. If you care about professional realism and brand consistency, especially for teams, a focused tool like HeadshotVIP is usually the safer bet.
Practical tips for AI business card headshots that don’t look fake
1. Choose realism over filters
Avoid:
- Heavy skin smoothing
- Extreme eye whitening
- Overdone teeth-brightening
- Cartoon or illustration filters
In print, these look especially unnatural. Aim for a clean but realistic AI professional headshot that still looks like you on a good day.
2. Keep backgrounds simple and bright
For business cards:
- Prefer light, neutral backgrounds:
- Light gray
- Soft beige
- Off‑white
- If using a color:
- Soft, low-saturation versions of your brand color
- Ensure strong contrast with your hair and outfit
Busy office scenes, bookshelves, or cityscapes may look cool online but tend to muddy up in small print.
3. Test different crops for clarity
Make duplicates of your card design with slightly different headshot crops:
- One with closer crop (head and top of shoulders)
- One with a bit more breathing space
Print them on normal paper and decide which one is easiest to recognize at a glance. Subtle changes can make a big difference at small sizes.
4. Match your in-person look
Remember: your card is often handed over in person. If your AI virtual headshot looks too idealized, there’s a subtle trust gap.
Try to keep:
- Hair length/style reasonably close to real life
- Facial hair accurate
- Age resemblance realistic (avoid “de‑aging” filters)
AI should show you at your best, not unrecognizable.
5. Use one image across your ecosystem
For strong personal branding, use the same or a closely related AI headshot on:
- Business cards
- Email signature
- Website bio / About pages
This repetition helps people remember you faster. HeadshotVIP’s output is already optimized for LinkedIn, CVs, and company sites, so you can reuse the same shot across all channels.
For more ideas on branding use, see:
- ai-professional-headshot-branding-guide-2025
- ai-professional-headshot-examples-ideas-for-linkedin-2025
FAQ: AI-generated headshots for business cards
Q1: Are AI-generated headshots good enough for printed business cards?
A: Yes—if you use a tool that produces high-resolution, realistic portraits and you respect basic print guidelines. HeadshotVIP and leading generators like Aragon typically output images well above 1500 px on the short side, which is more than enough for small printed headshots. The main things to watch are: sharpness, natural skin texture, and not over-smoothing. Always print a test card before doing a full run.
Q2: What file format should I use for my business card headshot?
A: For most online printers and design tools, high-quality JPG is fine for photos. If your printer explicitly recommends it or you’re working with a designer, PNG can preserve slightly more detail and avoid compression artifacts. Whichever you choose, ensure the image is large (1000+ px) and the final card export is at 300 dpi.
Q3: Is it okay to tell clients my photo is AI-generated?
A: In most professional contexts, yes. Many recruiters and clients now accept or even prefer clear, well-lit AI professional headshots over poor real photos, as noted in recent coverage of AI headshot tools by outlets like The Washington Post and Business Insider (example). What matters most is that the image honestly represents what you look like and doesn’t mislead about your identity.
Summary
You don’t need a studio session to get a clean, modern, business-ready portrait for your cards anymore. With a few good selfies, you can create an AI-generated headshot that:
- Looks professional and realistic
- Prints sharply at business card size
- Aligns with your brand colors and style
- Stays consistent across LinkedIn, resumes, and websites
HeadshotVIP makes this workflow straightforward: upload your photos, choose a business style, pick the best shot, crop it correctly, and drop it into your card design. For individuals and teams, this is usually faster and far more affordable than traditional photography—while still looking like a real studio shoot.
Try HeadshotVIP Now:
- Starter: $6.99
- Professional: $9.99
Related Articles
- ai-generated-headshot-tips-to-look-professional-2025
- best-ai-professional-headshot-tools-for-business-2025
- ai-professional-headshot-branding-guide-2025
Current Date: 2026-02-01