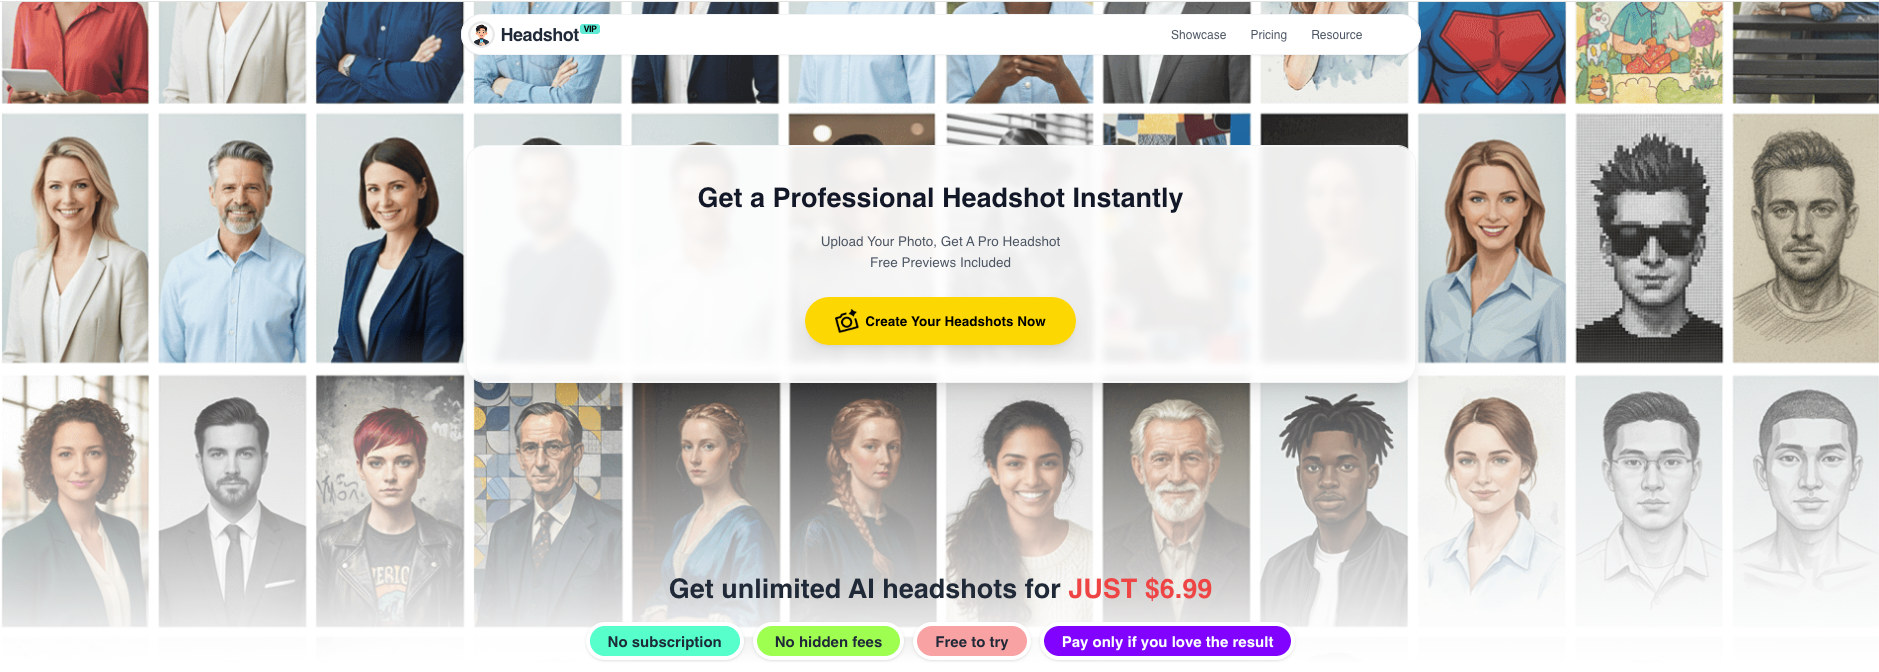
Boost AI professional headshot results with 7 expert tips (2025)
Boost AI professional headshot results with 7 expert tips (2025)
If you’ve tried an AI professional headshot generator and thought, “Why do I look slightly… off?” you’re not alone. Blurry hairlines, strange skin texture, awkward crops – most of the time this isn’t the AI’s fault. It’s the input and the way the final image is formatted.
Here’s how to fix that.
This guide skips the generic “upload 10 selfies and wait” advice. Instead, you’ll get 7 concrete, battle‑tested tips to improve AI professional headshot results on any tool (HeadshotVIP, Canva, Aragon AI, etc.), plus a quick workflow you can copy for LinkedIn, resumes, and company profiles.

Why most AI headshots look fake (and how to avoid it)
Across Canva’s AI headshot FAQ, Aragon AI’s landing page, and independent reviews of 30+ tools, the same problems keep coming up:
- Users upload dark, low‑quality selfies
- Faces are partially covered (hair, glasses glare, hats)
- Poses are too casual or at strange angles
- Final images are poorly cropped for LinkedIn or CVs
- People pick styles that don’t match their industry
The result: over‑smoothed “plastic” skin, strange teeth, or a headshot that looks like your cousin, not you.
The good news: you can fix most of this with a simple checklist before you upload and a few smart tweaks after you generate.
Below are the 7 expert tips we use internally when testing HeadshotVIP on real professionals and teams.
1. Nail your source photos: lighting, angle, and expression
Every AI professional headshot model learns your identity from your uploads. If the input is bad, the best model in the world can’t fully save it.
The 10‑minute “perfect input” checklist
You don’t need a studio – just follow these basics:
Lighting
- Face a window during daytime; avoid harsh sunlight and overhead lights
- Avoid strong light from behind you (it makes your face dark)
- Turn off colored RGB lights – they confuse skin tones
Angle & framing
- Hold your phone (or ask a friend) at eye level, not from above or below
- Capture head and shoulders, with a bit of chest visible
- Leave space above your head and on both sides (helps AI with cropping and background)
Expression
- Go for a relaxed, slight smile – it reads as confident and approachable
- Avoid exaggerated expressions unless you want a very casual look
- Keep your eyes clearly visible (no heavy shadows, hair across one eye, or big sunglasses)
What to avoid in your AI-generated headshot source photos
- Group photos where the AI has to guess which person you are
- Heavily filtered selfies (beauty filters, AR masks, Snapchat lenses)
- Motion blur and low‑resolution screenshots from video calls
If you only fix lighting + angle + expression, you’ll already see a huge jump in your AI headshot quality on any platform.
2. Dress like the job you want (AI will amplify it)
AI tools can change your clothing, but they do a much better job when they understand your default style and context from your uploads.
Choose outfits that send the right signal
Think about your main use case:
LinkedIn & corporate roles:
- Solid color shirt or blouse
- Blazer or jacket in neutral tones (navy, charcoal, black, beige)
- Avoid loud patterns and big logos
Startups, tech, creative fields:
- Clean, well‑fitted T‑shirt, polo, or casual shirt
- Simple textures (denim, knit) but still neat
- You can skip the blazer; a minimal background keeps it professional
Freelancers & creators:
- Clothes that match your brand (even color‑branded)
- Still avoid busy patterns that can break when the AI re‑renders fabric
Many users report that when they upload photos wearing hoodies, caps, or beachwear, AI tools struggle to output trustworthy business portraits – even if they offer “add a suit” features.
Best practice: upload at least a few photos where you’re already dressed close to your desired result. This gives the AI a strong style baseline.
3. Use the right poses and head positions
AI can slightly adjust pose, but it still relies on your original head position and posture.
Poses that translate well to AI professional headshots
Use these 3 simple setups when shooting your input photos:
Straight‑on, neutral
- Shoulders squared to camera
- Slight head tilt is fine
- Great for formal LinkedIn and corporate directories
¾ angle (very flattering)
- Turn your body about 30–45° away from the camera
- Turn your head back toward the lens
- Works well for founders, speakers, and real estate pros
Relaxed lean
- Sit on a chair, lean slightly forward
- Rest one arm on a table or your thigh
- Gives a friendly, conversational vibe without looking too casual
Poses to avoid in AI headshot training photos
- Extreme side profile (AI may “guess” your other eye incorrectly)
- Looking down sharply at your phone or laptop
- Hand covering your mouth or chin in every photo
- Strong fish‑eye distortion from ultra‑wide lenses
When we test HeadshotVIP with real users, a simple mix of 3–8 photos in these poses leads to noticeably better identity consistency and more natural expressions across generated results.
4. Give AI enough variety – but not chaos
Most AI virtual headshot tools ask for anywhere between 6 and 20 photos. That range isn’t random.
How much variety is just right?
Aim for:
- 6–12 photos total for most tools
- Mix of:
- 2–3 straight‑on shots
- 2–3 slight ¾ angle shots
- 1–2 seated or slightly different environments
Keep these consistent:
- Same hair color and length (don’t mix long hair + buzz cut + wigs)
- No drastic weight changes across photos
- Similar age (don’t mix old photos from a decade ago)
What you want is controlled diversity: different lighting and micro‑expressions, but the same recognizable person.
Too much chaos (different haircuts, heavy makeup in some, glasses in others, hats, masks, etc.) makes the model guess, and that’s when you start to see “someone who looks like your sibling” instead of you.
5. Control your background and cropping for LinkedIn & resumes
Most AI generators give you beautiful results… and then people ruin them with bad cropping.
Ideal crop for AI professional headshots
For LinkedIn, resumes, and “About” pages, use:
Aspect ratio:
- LinkedIn profile: close to 1:1 square
- Websites & CVs: 4:5 or 3:4 (portrait)
Framing:
- Top: small space above your head
- Bottom: mid‑chest or just below shoulders
- Sides: keep your shoulders fully visible
Think of your head occupying roughly 60–70% of the frame height.
If you crop too tightly around just your face, you lose the professional “portrait” feel. Too wide and you look tiny in the LinkedIn circle.
Choose backgrounds that look like real locations
AI can generate all sorts of fancy backdrops, but for professional use the safest bets are:
- Soft office blur
- Neutral gradient (light gray, off‑white, soft blue)
- Subtle textured wall
- Outdoor, softly blurred city or greenery (for more casual roles)
Studies and recruiter surveys (including coverage referenced on Aragon AI’s site) suggest that clear, distraction‑free backgrounds make it easier for hiring managers to focus on your face and credentials.
Rule of thumb: if the background draws more attention than your eyes, switch it.
6. Match your style to your platform and industry
A “perfect” AI-generated headshot for an actor is not the same as for a corporate lawyer or a UX designer.
Quick style map by platform
LinkedIn headshot generator use
- Aim for neutral or slightly warm tones
- Clean, minimal background
- Smart‑casual to business‑formal clothing
- Expression: approachable, subtle smile
Personal website / portfolio
- You can lean more creative:
- Stronger color grading
- Slightly more dramatic lighting
- More environmental context (a studio, co‑working space, etc.)
- You can lean more creative:
Social media (Instagram, TikTok, YouTube)
- Brighter colors, a bit more contrast
- Casual outfit okay, but still neat
- Stronger expression and personality
When you use an AI virtual headshot tool, don’t pick styles at random. Instead, pick one base style per platform and stick to it for consistency.
This is also where many tools diverge:
- Canva focuses on easy editing and social‑friendly looks
- Aragon AI offers lots of packs (dating, modeling, glamour, etc.)
- HeadshotVIP focuses on business‑ready styles (LinkedIn, corporate, startup, executive, creative) with output formats tuned for professional use
Choosing the right style pack is half the battle.
7. Do a light post‑edit pass (but stop before you look plastic)
AI is good, but a quick 3–5 minute edit can turn a “pretty good” result into a top‑tier professional headshot.
Safe, realistic edits you should make
Whether you’re using Canva, HeadshotVIP downloads, or another editor:
Adjust exposure & contrast
- Brighten the face slightly if it looks dull
- Add a touch of contrast for crispness
White balance
- Fix overly warm (orange) or cold (blue) skin tones
- Aim for natural‑looking skin
Minor blemish cleanup
- Temporary spots or small distractions are fine to remove
- Keep natural lines and moles; recruiters expect you to look human
Sharpening & compression
- Light sharpening helps when platforms downscale your image
- Export in high resolution (at least 1024×1024 for LinkedIn)
Where to stop
You’ve gone too far if:
- Skin looks like plastic or wax
- Hair edges are unnaturally sharp or blurred
- Eyes are so bright they glow
- Your friends say, “Nice photo… but is that really you?”
Remember: many companies now see AI headshots as acceptable – but they still expect the person who walks into the interview to resemble the photo.
How to apply these tips inside HeadshotVIP (recommended workflow)
Now that you know the 7 optimization levers, here’s how to put them into practice with HeadshotVIP. The same logic applies if you use other tools, but we’ll show the workflow with our own product since we can control the details.
Method 1: Using HeadshotVIP (Recommended)
Use case:
Professionals, job seekers, founders, and teams who want LinkedIn‑ready, resume‑friendly AI professional headshots with minimal fuss and consistent results.
Alt: HeadshotVIP interface for generating AI professional headshots in different styles
Operation steps
Prepare your source photos (5–10 minutes)
- Use the checklist from Tips 1–4: good lighting, eye‑level angle, clear expression, business‑appropriate clothing.
- Aim for 6–12 photos, with a mix of straight‑on and ¾ angles.
Go to HeadshotVIP
- Visit https://headshot.vip in your browser.
- Create a free account or sign in.
Choose your professional style pack
- Select from business‑focused styles such as:
- LinkedIn Classic
- Corporate Executive
- Startup Founder
- Creative Professional
- Pick the one that best fits your industry and target platform (Tip 6).
- Select from business‑focused styles such as:
Upload your photos
- Upload your curated set of selfies or portraits.
- Check that:
- Your face is fully visible in each
- No heavy filters or extreme crops
- There’s some space around your head and shoulders
Configure background & format preferences
- Choose background types aligned with Tip 5: neutral office blur, gradient, or soft studio.
- HeadshotVIP optimizes aspect ratios for LinkedIn, CVs, and “About” pages by default, so you get platform‑friendly crops out of the box.
Generate your AI professional headshots
- Click Generate and let the AI model build a consistent identity profile.
- In a short time, you’ll receive a set of professionally styled headshots.
Pick favorites and do light post‑edits
- Browse the gallery and mark your top images.
- If needed, do small adjustments: crop for LinkedIn’s circle, tweak brightness/contrast.
- Download high‑resolution versions ready for LinkedIn, resumes, and company sites.
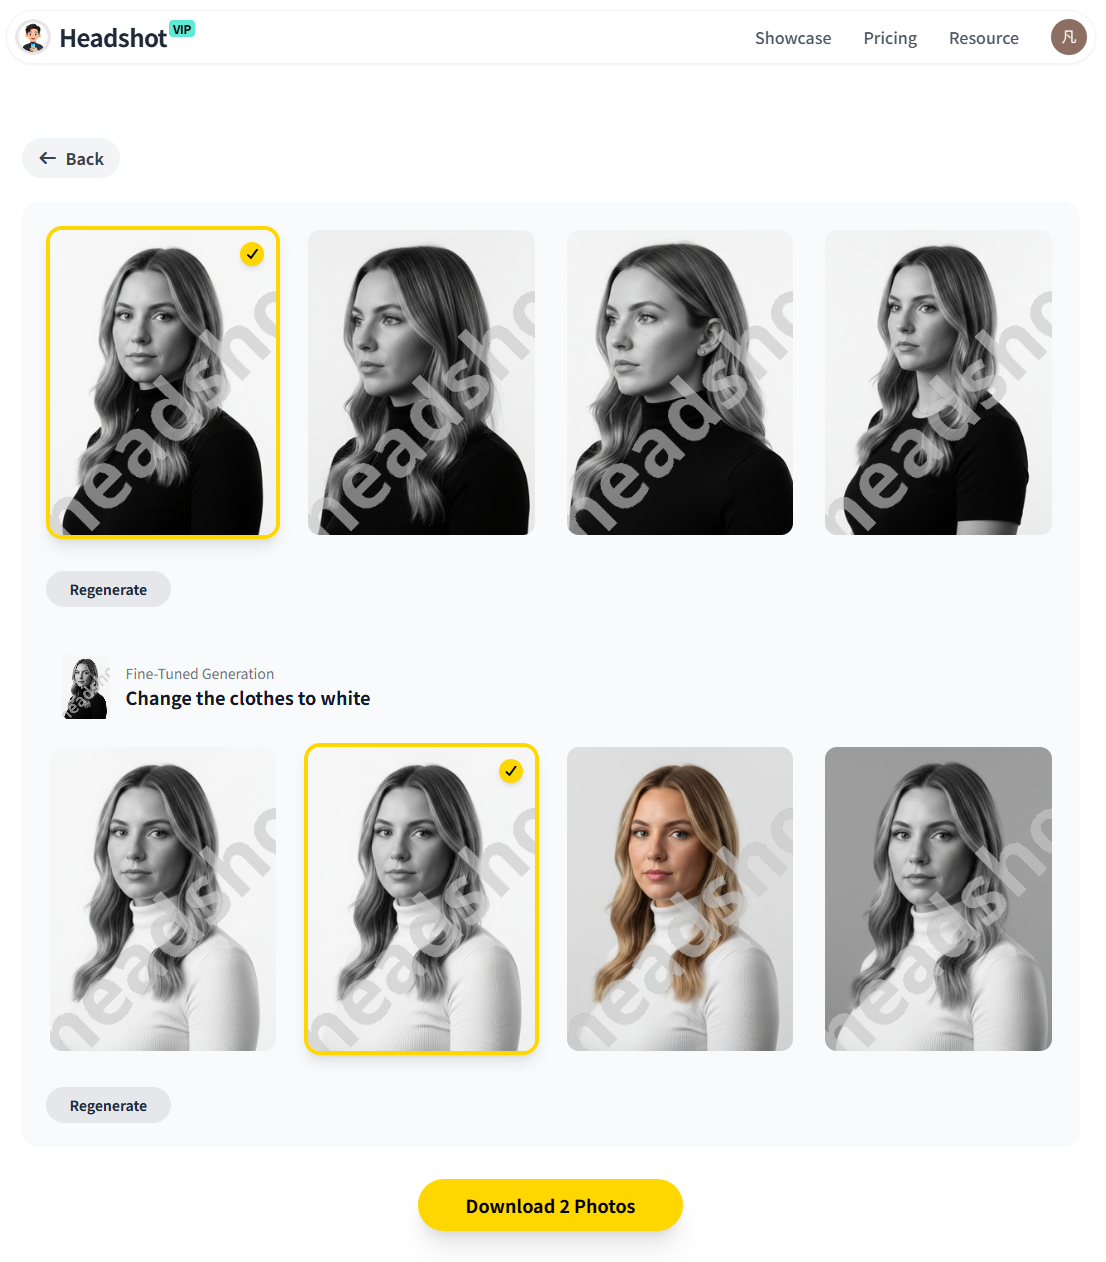
Alt: AI-generated business portrait result created with HeadshotVIP
Advantages of HeadshotVIP for this workflow
✅ Business‑first styles
All style packs are designed for LinkedIn, resumes, and company profiles – not cosplay or meme filters.✅ Identity consistency
Advanced facial recognition and modeling keep your features accurate across multiple outputs, even with different backgrounds and outfits.✅ Optimized for professional platforms
Outputs are tuned for standard profile aspect ratios and resolutions, so your AI professional headshot looks sharp after LinkedIn or ATS compression.✅ Team‑friendly consistency
Companies can generate uniform headshots for whole teams with the same style and background, ideal for “Meet the Team” pages.✅ Privacy‑focused processing
Images are handled with a privacy‑first approach. Photos are used for your headshots, not for unrelated model training, and processing is designed with security in mind.
Limitations (to keep expectations realistic):
- Final quality still depends heavily on your input photos – poor lighting or extreme angles will limit what AI can do.
- Pose control is not infinite; if you need highly specific body posing or props, a traditional photoshoot gives you more manual direction.
Method 2: Using general design tools (e.g., Canva, etc.)
You can also improve your headshots using broader design tools like Canva’s AI headshot generator or by editing existing photos manually.
How it works (simplified):
- Upload a selfie to a platform like Canva.
- Use their AI headshot or “Profile Photo” app to generate a professional‑style image.
- Use built‑in tools (background remover, filters, cropping) to tweak your final picture.
Pros:
- Can be free or low‑cost for light use
- Good if you already work heavily in Canva for social posts and documents
- Strong general‑purpose editing tools (text overlays, graphics, templates)
Cons (where HeadshotVIP has an edge):
- Not primarily focused on career and hiring use cases – styles often lean social/media‑friendly rather than strictly professional.
- Fewer options for company‑wide consistency (team headshots with matching style).
- Identity consistency and realism can vary more across generated images, especially compared with tools specifically tuned for professional headshots like HeadshotVIP or Aragon AI.
If you only need a quick update and already live inside Canva, this method works. If your goal is a recruiter‑ready, business‑first AI professional headshot – especially for multiple platforms or an entire team – a dedicated headshot generator like HeadshotVIP is usually the better fit.
Quick reference: 7 expert tips checklist
Use this section as your pre‑upload and post‑generation cheat sheet for any AI virtual headshot tool.
Fix your lighting
- Window light, face the source, no strong backlight.
Dress for the role
- Business‑appropriate, solid colors, minimal logos and patterns.
Use flattering, AI‑friendly poses
- Eye‑level, head and shoulders visible, avoid extreme angles.
Upload 6–12 consistent photos
- Same hair and general look, varied but not chaotic.
Choose smart backgrounds & crops
- Neutral, distraction‑free backgrounds; square or portrait crops optimized for LinkedIn and CVs.
Match style to platform and industry
- Corporate vs. startup vs. creative – pick the right “vibe” for where the photo will live.
Do light, realistic edits only
- Small tweaks to exposure, color, and blemishes. Avoid plastic skin and over‑sharpening.
Apply this once, and every AI-generated headshot you create (with HeadshotVIP or any other tool) will look more natural, more trustworthy, and more aligned with your career goals.
Summary
AI professional headshots are no longer a gimmick – many recruiters now accept them and, in some cases, even prefer them when they look clean and consistent. The difference between a “this looks AI” photo and a hire‑ready business portrait usually comes down to your inputs, your style choices, and your final formatting.
Use the 7 expert tips you’ve just seen – especially around lighting, clothing, pose, background, and platform‑specific cropping – and your results will improve dramatically, regardless of which generator you pick.
If you want a shortcut designed specifically for LinkedIn, resumes, and team pages, try:
Try HeadshotVIP Now:
- Starter: $6.99 – great for individuals who need a small set of polished headshots
- Professional: $9.99 – more styles and higher‑resolution outputs for multi‑platform use
Related Articles
- Professional-Headshot-Tips
- best-ai-professional-headshot-generator-for-linkedin-2025
- ai-professional-headshot-examples-ideas-for-linkedin-2025
Current Date: 2026-01-28