Boost AI-generated headshot results with 7 pro tips (2025)
Boost AI-generated headshot results with 7 pro tips (2025)
You upload your photos, wait for the AI to work its magic… and half the “headshots” look plastic, over-smoothed, or just not like you. Sound familiar?
Most AI tools can create a decent AI-generated headshot, but the difference between “okay” and “wow, that’s actually me” almost always comes from what you do before and after you click generate—not just which tool you use.
This guide walks you through 7 practical, tool-agnostic tips to consistently improve AI headshot quality in 2025. You’ll learn how to choose the right input photos, control style, fix common issues, and get better results faster. Along the way, you’ll see how to apply each tactic inside HeadshotVIP to get realistic, 4K-ready portraits with stronger privacy and style control.

Why many AI-generated headshots miss the mark (and how to fix it)
Across the top articles on AI headshots, a few patterns show up again and again:
Input quality rules everything
Reviewers who upload clear, varied selfies get far more usable images. Poor lighting, heavy filters, and odd angles confuse the model and create uncanny results.Realism and likeness are harder than “pretty”
Tools easily produce flattering, “polished” faces—but struggle with face likeness, skin tone consistency, and avoiding “plastic” or over-smooth textures. That’s why many people feel AI headshots look like a cousin, not them.Ethics, privacy, and rights matter
Serious users care who owns the images, how long photos are stored, and whether faces are used to train future models without consent. Top reviewers now check terms of service as carefully as they check quality.
What’s missing from most guides is a step-by-step playbook you can apply to any AI headshot generator to systematically improve your results.
That’s what the next sections give you.
7 pro tips to improve any AI-generated headshot in 2025
These tips work whether you’re using HeadshotVIP, Canva, Aragon, or any other generator. Where it helps, you’ll see a short note on how to do it specifically in HeadshotVIP.
1. Start with “training” photos the AI can actually understand
If the AI can’t clearly read your face, it will guess. That’s where weird teeth, shifted eye color, and off-model jawlines come from.
Use 10–20 photos that are:
- Sharp and high-res
Avoid screenshots, group crops, or photos-of-photos. - Well lit
Natural daylight or soft indoor light. No harsh backlight, no colored party lights. - Face-forward
Mostly looking at the camera, with a few slight angles. - Unobstructed
No sunglasses, big hats, hands covering your chin, or heavy motion blur. - True-to-life
Your current hairstyle, current weight, natural skin tone, minimal filters.
Avoid:
- Snapchat/beauty filters
- Old photos that don’t look like you now
- Extreme makeup if you don’t wear it regularly
- Cosplay, costume, or themed shoots
🔧 In HeadshotVIP:
Upload a mix of close-up selfies and half-body shots with neutral or simple backgrounds. The model uses advanced facial identity consistency to lock onto your real features—so the better your source photos, the more you still look like you in 4K.
2. Match your style to your actual professional context
A common mistake: telling the AI “make me look like a CEO” when you actually work in a creative startup—or asking for a super-casual look when you’re applying for executive roles.
Your AI-generated headshot should match how people expect to see you in your role and industry.
For different roles, aim for:
Corporate / Finance / Law
- Attire: Suit or blazer, solid or subtle pattern shirt
- Background: Neutral, office, or light gradient
- Expression: Calm, confident, approachable
Tech / Startup / Product
- Attire: Smart casual (oxford, knit, simple tee + jacket)
- Background: Clean office, coworking space, or soft-color backdrop
- Expression: Friendly, energetic, open
Creative / Marketing / Freelance
- Attire: Stylish but not overly busy
- Background: Brighter colors, textures, or studio-style gradients
- Expression: Warm, expressive, relaxed
Academia / Nonprofit / Public sector
- Attire: Business casual, simple accessories
- Background: Subtle library, office, or neutral tones
- Expression: Thoughtful, kind, trustworthy
🔧 In HeadshotVIP:
Choose among LinkedIn, corporate, executive, startup, or creative presets. These presets bundle background, lighting, and framing choices that fit typical expectations for each environment—so you’re not manually guessing styles.
3. Control lighting and background for instant “studio” upgrades
Most AI headshot problems boil down to bad virtual lighting and chaotic backgrounds. even when the face looks fine, harsh shadows or busy backdrops make the image feel “cheap” or obviously fake.
For better lighting:
- Aim for soft, even light on the face—no deep shadows under the eyes.
- Specify in prompts or settings:
- “soft studio lighting”
- “even front lighting”
- “subtle background blur”
- Avoid overly dramatic, cinematic lighting unless that fits your brand.
For better backgrounds:
- Choose clean, distraction-free backdrops:
- Soft gradients (light grey, light blue, beige)
- Minimalist office interiors
- Lightly blurred city or office windows
- Keep colors aligned with your wardrobe:
- Dark suit → lighter background
- Light shirt → medium or darker background
Many tools let you tweak background and lighting afterwards; some require you to pick styles up front.
🔧 In HeadshotVIP:
The engine rebuilds background and lighting around your face, optimizing for platforms like LinkedIn and company bios. You can:
- Pick business-focused backgrounds (corporate, startup, executive office, neutral studio).
- Lean on the AI to automatically balance exposure and contrast so skin doesn’t blow out or look muddy.
4. Dress strategically: what to “wear” in your AI headshot
Whether the tool lets you choose virtual outfits or infers from your uploads, your clothing does a lot of the credibility work.
What usually works best:
- Solid or subtly patterned tops
Busy prints compete with your face and confuse some models. - Mid- to high-contrast with your skin tone
This helps the AI find clear edges and produces cleaner results. - Classic necklines
Button-ups, simple blouses, round or V-neck tops. Avoid deep cuts for professional contexts. - Simple jewelry and accessories
Avoid large, reflective pieces that can glitch or distort.
If your tool offers wardrobe presets, pick the set closest to what you’d actually wear to:
- A job interview
- A client pitch
- A conference or panel talk
🔧 In HeadshotVIP:
You can select from business and executive outfit styles (e.g., blazer + shirt, smart casual layers) that are tuned to look natural and wrinkle-correct in 4K. This reduces the chance of weird collars, mismatched lapels, or AI-invented logos.
5. Use expression and pose prompts to avoid “plastic” faces
Many users complain that AI headshots look over-smooth and expressionless, or that smiles look forced. That’s often because tools default to a very generic, beauty-filtered face.
You can guide the model with subtle, human prompts.
For expressions, try wording like:
- “gentle smile, relaxed jaw”
- “friendly but professional”
- “neutral, confident expression”
- “subtle smile, no teeth”
Avoid extremes such as “huge smile” or “laughing,” which some models still struggle to render realistically.
For pose and framing:
- Ask for:
- “head and shoulders”
- “slight angle to camera”
- “eyes looking at camera”
- For more dynamic shots:
- “three-quarter view, arms relaxed at sides”
- “seated at desk, laptop slightly visible, face centered”
🔧 In HeadshotVIP:
While you don’t write long prompts, HeadshotVIP’s style presets are tuned for natural expression and executive-friendly framing. Because it focuses on professional use, it avoids the overly glamorized, plastic skin look that general-purpose AI art tools often produce.
6. Iterate like a pro: sort, shortlist, and refine
Every serious reviewer of AI headshot tools says the same thing: you won’t love every result, even from the best generators. The win is getting enough accurate, flattering options you’d actually use on LinkedIn, your CV, or your website.
Treat generation like a mini photo shoot:
Generate in batches
Run multiple style presets or sessions rather than betting everything on a single run.Do an initial fast pass
- Delete anything that obviously:
- Distorts your face
- Changes your ethnicity, age, or eye color
- Adds “AI hands” or warped accessories
- Delete anything that obviously:
Shortlist 5–10 contenders
From the remaining set, pick images that:- Look undeniably like you
- Match your real-world professional vibe
- Have clean backgrounds and simple, consistent lighting
Check them in context
Upload a few options into:- Your LinkedIn profile preview
- Your resume layout
- Your portfolio / About page mockup
You’ll quickly see which options feel too dark, too distant, or too stylized.
Regenerate with tweaks as needed
If everything is too formal, lighten attire and background.
If you look too stiff, aim for slightly warmer expressions.
🔧 In HeadshotVIP:
You get multiple variations per style, all in high resolution. Because outputs are already optimized for common aspect ratios and crops, what you see in the gallery is close to how it will look on LinkedIn and resumes—making the shortlist process faster.
7. Protect your privacy and image rights from day one
Reference reviews of top tools stress something many users skip: terms of service and data handling. You’re uploading your face, plus possibly your team’s faces. That deserves more than a quick “accept all.”
When you choose an AI headshot generator, check:
Who owns the outputs?
Ideally: you own all AI-generated headshots and the original uploads.How long are your photos stored?
Look for:- Clear retention periods
- Options to delete data and models
Will your images train future models?
Some services explicitly reserve the right to use your face to improve their AI. Decide if you’re comfortable with that.Is the service transparent about security?
Even if systems are secure, the tool should at least explain:- How uploads are stored
- How deletion works
- Whether third-party processors are involved
Bias and likeness considerations
If you’re a person of color or have features underrepresented in training sets, be extra critical about:- Skin tone accuracy
- Hair texture
- Ethnic features remaining intact
🔧 In HeadshotVIP:
HeadshotVIP is privacy-focused by design. It emphasizes:
- Professional use (not memes or entertainment)
- Strong identity consistency rather than “beautified strangers”
- Transparent, business-ready handling of uploads and results
For teams, this matters even more: you want consistent, on-brand portraits without creating a long-term facial recognition dataset in the background.
How to get better AI-generated headshots using HeadshotVIP (step-by-step)
Method 1: Using HeadshotVIP (Recommended)
Use case:
Professionals, job seekers, and teams who want realistic, LinkedIn-ready AI headshots without a photographer, and who care about both quality and privacy.
Operation steps:
Go to HeadshotVIP
Visit the official site: https://headshot.vipCreate your account
Sign up with your email. Choose the Starter, Professional, or Team plan based on how many styles/images you need.Prepare and upload your photos
- Collect 10–20 clear selfies and half-body shots.
- Make sure they follow the tips above (good lighting, no heavy filters).
- Upload them through the secure upload interface.
Choose your style preset
- Pick from LinkedIn, corporate, startup, executive, or creative business styles.
- Select background types that match your industry (neutral studio, office, subtle gradient, etc.).
Generate your AI headshots
- Confirm your selections.
- HeadshotVIP’s AI processes your photos, builds your identity model, and generates multiple 4K-quality portraits in each chosen style.
Review, shortlist, and download
- Mark favorites, discard any that don’t feel like “you.”
- Download your top picks in high resolution, ready for:
- LinkedIn and X (Twitter) profiles
- CVs and cover letters
- Company websites and About pages
- Speaker bios and portfolios
Advantages:
- ✅ Business-focused styles only – No random outfits or party themes; everything is tuned for professional use.
- ✅ High-resolution, 4K-ready outputs – Crisp enough for resumes, press kits, and large corporate “Our Team” pages.
- ✅ Identity consistency modeling – Advanced AI keeps your key features, skin tone, and age realistic.
- ✅ Style-consistent team batches – Perfect for remote teams that need unified, on-brand headshots wherever they are.
- ✅ Privacy-conscious workflow – Built for professionals, not novelty avatars; designed with serious data handling expectations in mind.
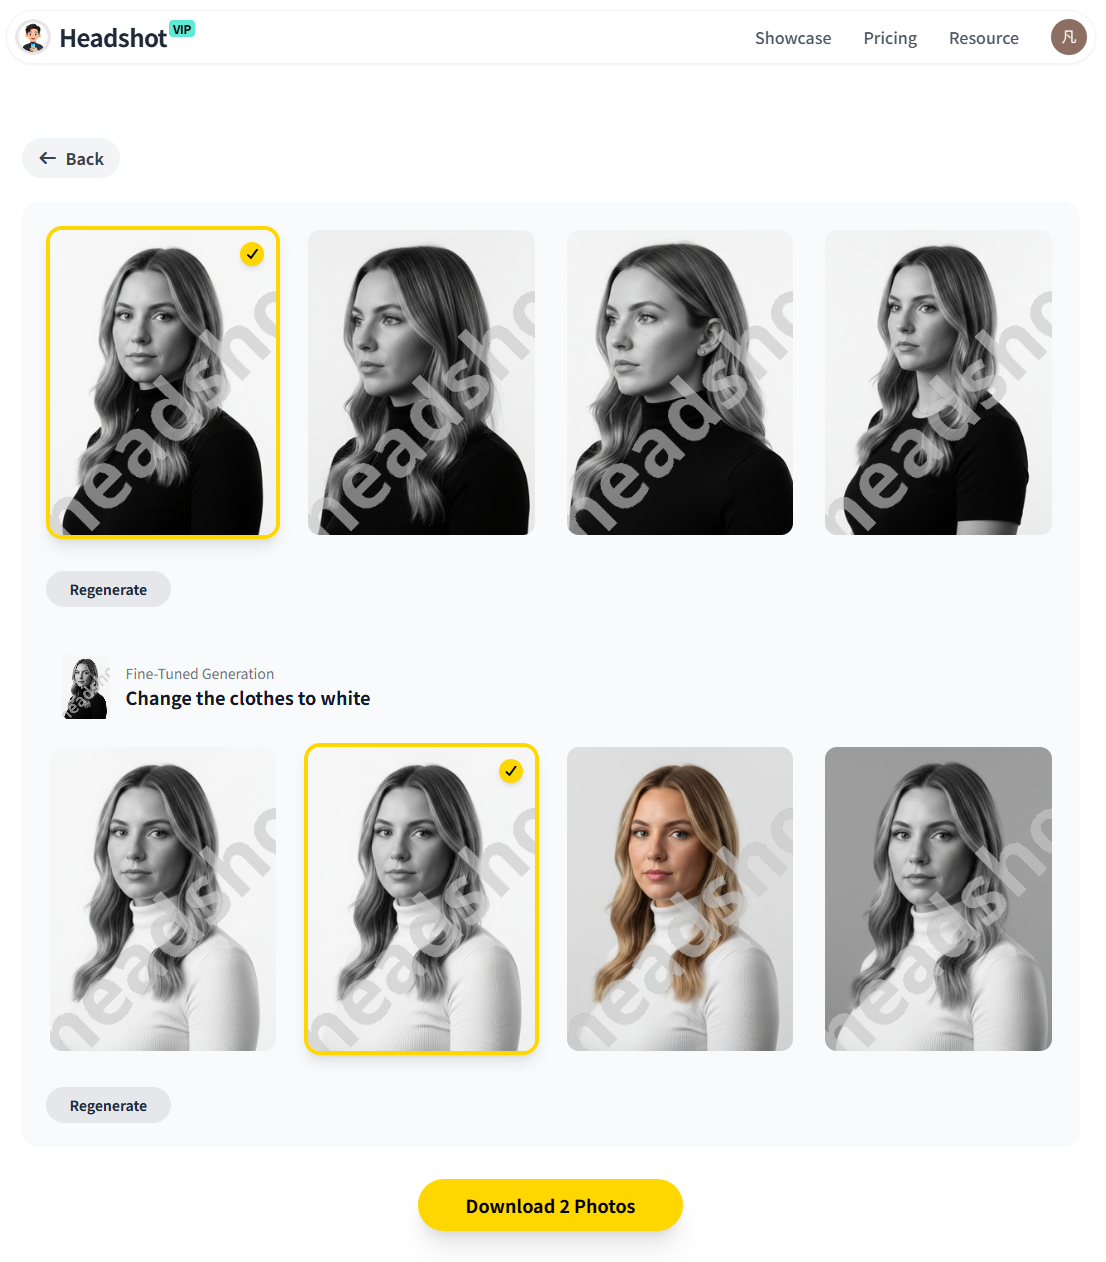
Alt text: HeadshotVIP AI-generated headshot gallery showing multiple professional styles
Method 2: Using generic AI image or design tools (e.g., Canva, general AI art)
Some users generate headshots using general-purpose AI tools or design platforms that added AI headshot features on top of their core editor.
How these usually work:
- You upload a few selfies.
- Choose a broad style (e.g., “professional”).
- The tool generates a set of portraits.
- You further retouch them using the built-in editor (filters, background remover, etc.).
Pros:
- Often cheap or partially free with limited credits.
- Integrated with other design tools (great for social media posts, banners, etc.).
- Good for casual or semi-professional use.
Cons (vs. HeadshotVIP):
- ❌ Less identity-accurate for professional use – Results can look more like “polished strangers,” especially if trained for general art.
- ❌ Limited business-specific controls – Fewer presets tuned for LinkedIn, resumes, and corporate websites.
- ❌ Lower consistency for teams – Harder to produce a uniform look across many employees.
- ❌ Potentially unclear rights/data use – Terms may prioritize creative usage over strict privacy, so you need to read them carefully.
General tools are fine if you just need a quick upgrade from a selfie. But if you’re basing your career image, client trust, or company brand on these headshots, a dedicated professional tool like HeadshotVIP usually delivers more realistic, trustworthy results.
Quick comparison: generic AI vs dedicated pro headshot tools vs HeadshotVIP
| Feature | Generic AI Art / Design Tools | Typical AI Headshot Sites | HeadshotVIP |
|---|---|---|---|
| Core focus | Creative images, social posts | Mixed (fun + professional) | Professional business headshots |
| Realism & face likeness | Varies, often stylized | Medium to high | High, tuned for LinkedIn & resumes |
| Style presets for business | Limited or generic | Some business options | LinkedIn, corporate, startup, exec |
| Resolution for print/CV use | Often web-only | Usually decent | 4K-ready, CV & website optimized |
| Team / company-wide consistency | Manual work | Some support | Style-consistent batch generation |
| Privacy & data handling focus | Varies widely | Mixed | Privacy-focused, pro use cases |
| Best for | Casual profiles, experiments | General users, mixed needs | Job seekers, pros, and teams |
FAQ: getting the most from your AI-generated headshot
Q1: How do I make my AI-generated headshot look real, not fake?
Focus on input quality + subtle styles. Use sharp, well-lit photos without filters, pick realistic business attire, and avoid over-glam or cartoon-like presets. Choose tools (like HeadshotVIP) that prioritize identity consistency over “beautification.” Finally, compare the result side-by-side with a real photo of you—if it changes your facial structure or skin tone too much, discard it.
Q2: How many photos should I upload to an AI headshot generator?
Most tools work best with 10–20 images. Too few, and the model guesses; too many low-quality shots can actually hurt. Pick a curated mix: different angles, a couple of backgrounds, but always clear, current, and true to how you look day-to-day. HeadshotVIP is optimized around this range and doesn’t require you to hunt for 30+ selfies.
Q3: Is it OK to use an AI-generated headshot on LinkedIn and my resume?
Yes—if it still looks like you and reflects how you’d appear in a real meeting. Many career experts now consider AI headshots “better than a selfie,” especially when budgets or logistics make professional photography hard. Just avoid overly edited, heavily stylized, or misleading images. Aim for natural, honest, and professional. Tools like HeadshotVIP are designed specifically with LinkedIn, resumes, and employer expectations in mind.
Summary
AI-generated headshots in 2025 can absolutely be good enough for LinkedIn, resumes, and serious professional branding—but only if you treat them like a real photo shoot:
- Feed the AI clean, current, high-quality photos.
- Choose styles, lighting, and attire that match your real-world professional context.
- Guide expressions and poses away from “plastic perfect” toward approachable and believable.
- Iterate and curate: keep only the images that look like the best version of your real self.
- Protect your privacy and image rights by picking tools with clear, professional-grade policies.
HeadshotVIP bakes these best practices into a focused workflow: 4K realism, business-first style presets, team consistency, and privacy-conscious handling. It’s built for people who want their AI-generated headshot to work as hard as they do.
Try HeadshotVIP Now:
- Starter: $6.99 – Ideal for individuals who need a set of polished, LinkedIn-ready headshots.
- Professional: $9.99 – More styles and higher-resolution outputs for multi-platform personal branding.
Related Articles
- ai-generated-headshot-tips-to-look-professional-2025
- best-ai-professional-headshot-generator-2025-guide
- ai-headshot-generation-privacy-protection-guide-2025
Current Date: 2026-02-08