Create AI virtual headshots for business profiles (2025)
Create AI virtual headshots for business profiles (2025)
If you’ve put off getting a professional headshot because studios are expensive, awkward, or just a time suck, you’re not alone. In 2025, more professionals are using AI virtual headshots instead of booking photographers—but a lot of the results you see online still look uncanny, over-edited, or “too AI.”
This guide walks you through how to create realistic, business-ready AI virtual headshots for LinkedIn, resumes, and company bios—without being technical, and without looking fake. You’ll learn how to prep your selfies, avoid common AI mistakes, match LinkedIn’s image requirements, and where HeadshotVIP fits into a simple, repeatable workflow.

What is an AI virtual headshot (and why it matters in 2025)?
Most “AI headshot generator” pages focus on the tool, not the outcome. Let’s clarify what you’re actually trying to create.
AI virtual headshot vs. regular AI headshot
An AI virtual headshot is:
- Based on your real face (trained from your selfies)
- Styled for business use (LinkedIn, company site, speaking bios, portfolios)
- Generated entirely online—no studio, no lights, no photographer
- Optimized for digital platforms (crop, resolution, aspect ratio, file size)
By contrast, generic AI avatars or filters often:
- Change your features or age dramatically
- Add extreme effects (cartoon, fantasy, anime, etc.)
- Ignore platform needs (wrong crop, low resolution, weird backgrounds)
For business profiles, recruiters and clients expect professional, realistic, slightly flattering photos—not AI cosplay. A strong AI virtual headshot should:
- Look like you on a great day
- Fit your industry norms (consulting ≠ creator ≠ designer)
- Be consistent across platforms (LinkedIn, website, email signature)
According to recent industry surveys, most recruiters now accept AI headshots as long as they look natural and honest. The tools are mature; the difference between a great and terrible result is mostly about how you prepare and what you ask the AI to do.
How to prepare source photos that give you realistic AI virtual headshots
Every reference article—from Canva’s quick tips to in-depth reviews on Medium—agrees on one thing: your input selfies matter more than the tool you pick. Here’s a practical, non-technical checklist.
1. Use the right device and lighting
You don’t need a DSLR. A modern smartphone in good light is enough.
Aim for:
- Daylight near a window (soft, even light on your face)
- Face turned slightly toward the light, not backlit
- No harsh overhead lighting that creates eye bags or deep shadows
Avoid:
- Dim rooms and yellow tungsten lights
- Strong direct sun that blows out your skin or creates hard shadows
- RGB/colored lighting that confuses skin tones
If you can clearly see your eyes, hair texture, and skin tone in the selfie, the AI model has what it needs.
2. Frame, angle, and expressions
Most tools (including HeadshotVIP, Aragon, Headshot Pro, etc.) perform best when you give them variety within a tight range:
- Distance:
- 70–80% close-up or head-and-shoulders
- 20–30% waist-up
- Angles:
- Mostly straight-on and slight 3/4 turns
- A couple looking very slightly up or down is fine
- Expressions:
- Relaxed neutral
- Soft, genuine smile
- Avoid extreme expressions (wide open mouth, squinting, goofy faces)
Think “how I’d naturally smile in a meeting” rather than “Instagram selfie face.”
3. Clothing and accessories
Even though AI can change outfits, you’ll get more realistic results when your selfies already feel professional.
Wear:
- Solid or subtle patterns in neutral or business colors
- Clothes that match your target roles (blazer, neat shirt, smart casual)
- Simple accessories (if you normally wear them)
Avoid:
- Busy prints and logos
- Hats, sunglasses, masks
- Heavy filters or beauty apps
Glasses:
If you always wear glasses in real life and want them in your AI virtual headshot, make sure at least half your photos include your glasses, and at least a few without. This helps the model understand your face shape, not just the frames.
4. Background and clutter
Most AI headshot generators replace or reconstruct backgrounds, but messy or chaotic scenes can still confuse the model.
Good:
- Plain wall, tidy office, or simple home environment
- Soft, defocused background (portrait mode is OK if not extreme)
Bad:
- Group photos where your face is tiny
- Cropped screenshots from video calls
- Party photos with colored spotlights
Rule of thumb: if a human retoucher would struggle to clean it up, it’s not a good training image.
5. Quantity: how many photos to upload?
Different platforms have different minimums, but realistic tools tend to ask for more variety:
- Absolute minimum: 6–8 high-quality selfies
- Ideal for business-grade results: 10–20 varied but consistent photos
With HeadshotVIP, you’ll get the best identity consistency if you upload:
- 6–10 close-up headshots
- 4–6 half body or waist-up shots
- All from different days/outfits, but still recognizably you
Method 1: Using HeadshotVIP to create AI virtual headshots (recommended)
This is the most straightforward way to go from everyday selfies to LinkedIn-ready AI virtual headshots with minimal fuss.
Who this works best for
- Professionals and job seekers updating LinkedIn, CVs, and portfolios
- Founders, freelancers, and creators who need a cohesive personal brand
- Remote teams and startups that want consistent company headshots without booking a photographer
Step-by-step: Create an AI virtual headshot with HeadshotVIP
Go to HeadshotVIP
Open the website in your browser:
👉 https://headshot.vipChoose a plan that fits your use case
- Starter – for individuals who just need a few strong headshots
- Professional – for multiple styles and higher resolution
- Team / Business – for companies needing consistent headshots for 5+ people
You don’t need to overthink this. If you’re refreshing your LinkedIn and portfolio, the Professional plan usually hits the sweet spot.
Create your account and set your profile basics
You’ll typically be asked for:
- Name (for organizing your shots)
- Gender presentation (for style templates)
- Industry/role (e.g., software engineer, marketer, designer, consultant)
This helps HeadshotVIP suggest business-focused styles that match your field: corporate, startup, executive, or creative.
Upload your source photos
Follow the prep checklist above, then:
- Upload 10–20 photos
- Mix close-ups and half-body shots
- Include photos with:
- Different outfits
- Slightly different angles
- Both glasses/no glasses, if relevant
HeadshotVIP’s identity consistency modeling uses these to build an internal representation of your face, so your AI virtual headshots actually look like you—rather than a generic model that vaguely resembles you.
Pick your preferred business styles
HeadshotVIP offers multiple business-focused looks, such as:
- LinkedIn classic – neutral background, smart casual or blazer
- Corporate – darker suits, formal lighting, subtle vignettes
- Startup / founder – softer tones, modern office or coworking vibe
- Executive – confident, polished, boardroom-ready
- Creative professional – slightly bolder colors, softer backgrounds
You can usually select a few styles at once, e.g.:
- 1–2 LinkedIn-ready vertical headshots
- 1 clean, wide shot for website hero sections
- 1 or 2 more relaxed, “about me” images
Let the AI generate your virtual headshots
Once you confirm styles, HeadshotVIP will:
- Analyze face structure, features, and expression
- Reconstruct lighting to more flattering, studio-quality setups
- Replace or enhance your background to match your chosen style
- Generate a batch of high-res images tuned for professional platforms
Depending on your plan, this usually completes in minutes, not days. You’ll receive an email or in-dashboard notification when your shots are ready.
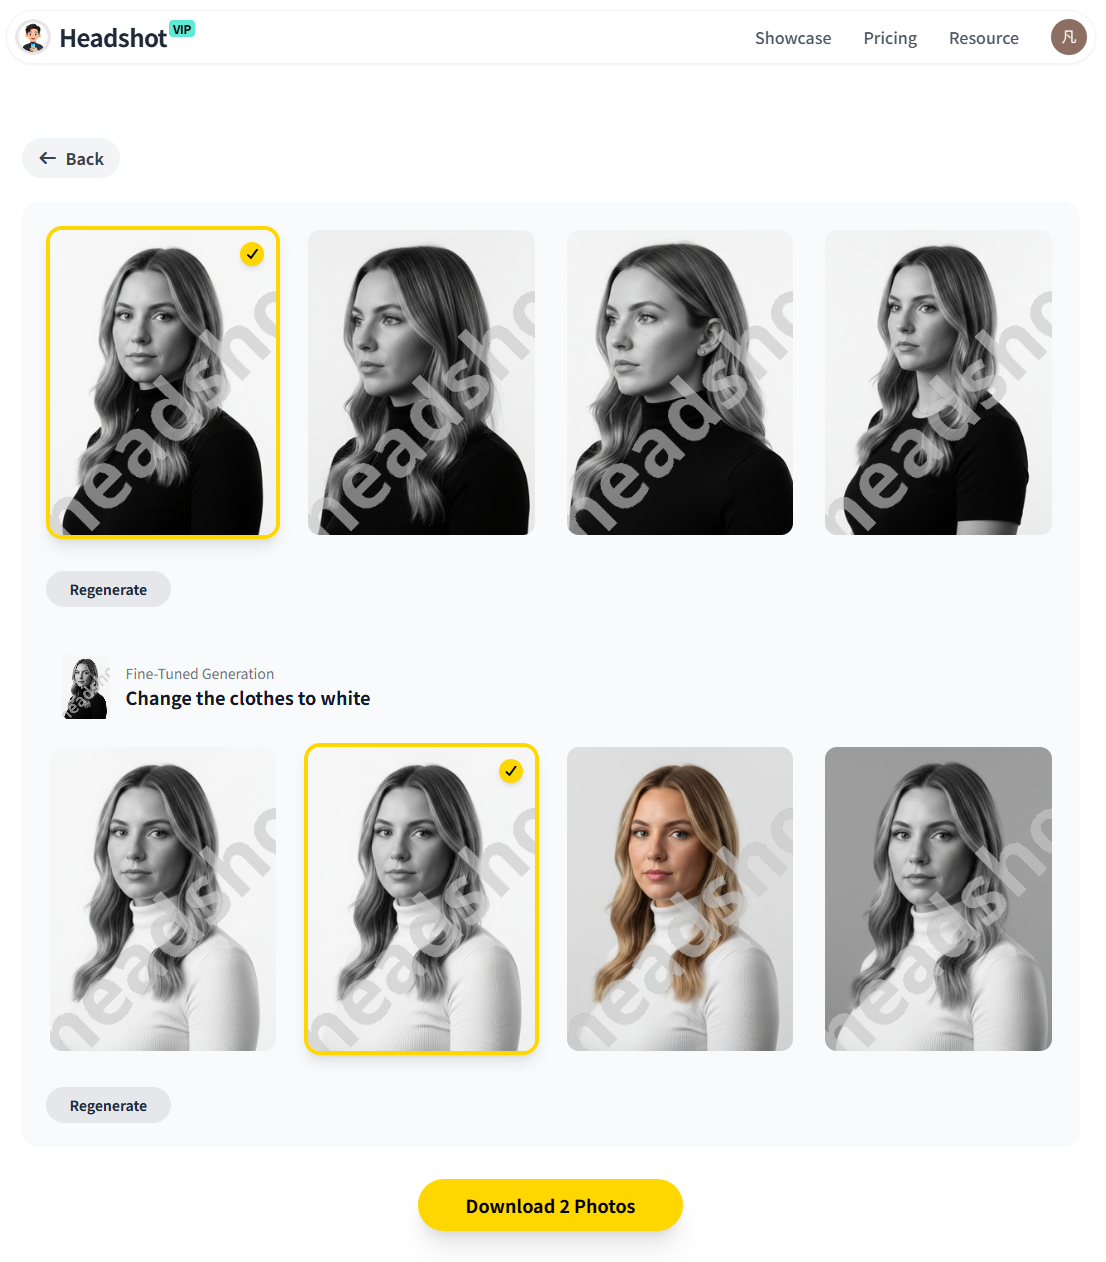
Review, select, and download
Inside your HeadshotVIP dashboard, go through your AI virtual headshots and:
- Favorite 3–5 images that feel most like you
- Check for:
- Eye shape and alignment
- Skin tone and texture (avoid overly plastic)
- Hairline and hairstyle realism
- Clothing details (no weird folds or asymmetry)
Export recommended formats:
- LinkedIn: 400×400 or higher, square crop, JPG or PNG
- CV & PDFs: High-res, neutral background
- Company website: Larger resolution, typically 3:4 or 4:5 aspect ratio
HeadshotVIP optimizes output for these common use cases so you don’t have to fiddle with export settings.
Why use HeadshotVIP for AI virtual headshots?
HeadshotVIP is built specifically for business profiles, rather than generic AI art. Compared with DIY setups or more general AI generators, you get:
✅ Business-focused looks by default
Designed for LinkedIn, resumes, company directories, and speaker bios—not dating apps or cosplay avatars.✅ Identity consistency
Advanced facial modeling helps your AI virtual headshot look like you across multiple styles and backgrounds.✅ Optimized output for professional platforms
Aspect ratios, resolutions, and compression tuned for LinkedIn, CVs, and About pages—no guessing.✅ Team-ready consistency
For companies, HeadshotVIP can apply the same lighting, framing, and background to every team member, something that’s hard even with real photographers.✅ Privacy-focused processing
Images are processed with privacy in mind; your uploaded selfies aren’t turned into a public training dataset.
Honest limitations to keep in mind:
- Results still depend heavily on your source selfie quality
- You don’t get absolute control over micro-poses like a live photographer would
- Manual retouching tools are limited compared to advanced Photoshop work
If you can live with those tradeoffs (most professionals can), you can go from “no headshot” to “LinkedIn ready” in under an hour.
Method 2: Other ways to generate AI virtual headshots (and where they fall short)
There are plenty of alternatives: Canva’s AI headshot feature, all-in-one tools like Aragon, and marketplaces like Fiverr where freelancers run AI pipelines for you. They all work—but they come with different pros and cons.
Option A: Design tools with integrated AI (e.g., Canva)
How it works (based on Canva’s approach):
- Upload 1–2 selfies into their headshot “app” inside the editor
- Choose gender identity and a broad style
- Let AI enhance lighting and background
- Fine-tune with built-in editing tools (background remover, filters, etc.)
Pros
- Easy for non-technical users
- Free or low-cost for basic use
- You can further edit and place your headshot directly into LinkedIn banners, resumes, and social posts
Cons
- Often limited in identity consistency and realism, especially from just 1–2 selfies
- More generic “pretty” results that can feel a bit filtered or stylized
- Styles are broad and not always tuned for different business contexts (corporate vs startup vs creative)
Option B: General-purpose AI headshot platforms (e.g., Aragon, BetterPic & co.)
Medium’s top-ranked reviews show tools like Aragon AI, HeadshotPro, and BetterPic can produce excellent, realistic AI headshots. They usually:
- Ask for 8–20 photos
- Let you choose multiple backgrounds and outfits
- Offer advanced editing (clothing changer, background changer, blemish remover, etc.)
Pros
- Very high realism when source photos are good
- Advanced editing to tweak backgrounds, outfits, and minor face details
- Some have strong security and compliance (e.g., SOC2, GDPR)
Cons
- Not always focused on business-only use—many also emphasize dating, “old money,” glamour, or fun filters
- Can overwhelm non-technical users with too many options
- Some tools lean strongly into marketing; you need to experiment before relying on them for brand-critical headshots
Option C: Hiring a Fiverr freelancer to generate AI headshots for you
This is basically outsourcing the AI process. As the Medium review points out:
- You upload 10–20 photos to a freelancer
- They run them through their preferred AI generators and retouching tools
- You get a curated batch of their best picks
Pros
- Human judgment on what looks good
- You don’t have to learn any tools
- You can request revisions and clarifications
Cons
- Privacy trade-off: you’re sending personal selfies to a third party
- Turnaround time depends on the freelancer (often 12–48 hours)
- Quality varies by provider, and you must vet reviews carefully
- Less scalable for teams and companies
Practical tips for AI virtual headshots that actually work on LinkedIn
Most existing guides stop at “upload selfies and pick a style.” To make your AI virtual headshot a real asset for your career, you need to think like a recruiter and a designer for a moment.
1. Match the style to your industry
Use your LinkedIn feed as a benchmark. Scroll through people who already have the job titles you want.
Corporate / finance / law / consulting
- Dark or neutral suit, solid background (grey, navy, white)
- Controlled, confident smile
- Slight vignette or subtle depth of field
Tech / startup / product / marketing
- Smart casual (shirt, light blazer, neat knitwear)
- Softer backgrounds: blurred office, coworking, modern interiors
- Friendlier expressions, slightly brighter lighting
Creative / design / content / media
- Bolder colors allowed, but keep one clean, neutral headshot for formal uses
- Interesting but not distracting backgrounds
When using HeadshotVIP, pick at least one style that aligns closely with your target industry norm, and another slightly more relaxed look for personal website or social content.
2. Mind the crop, composition, and eye line
For LinkedIn specifically:
Use a square crop with your:
- Eyes in the top third
- Face centered
- Roughly 60–70% of the frame filled by your head and shoulders
Leave some breathing room so your face doesn’t feel cramped
Avoid extreme closeups and full-body shots as profile photos
HeadshotVIP’s LinkedIn templates are designed with these composition rules baked in, which removes a lot of guesswork.
3. Keep editing subtle
AI generators already enhance skin and lighting. Over-editing after the fact is how you drift into the uncanny valley.
Keep manual edits to:
- Removing small blemishes
- Very light exposure or contrast tweaks
- Minor crop adjustments
Avoid:
- Over-smoothing skin
- Enlarging eyes, reshaping noses, or changing face shape
- Extreme color filters
The goal is, “You on your best day,” not “a slightly different person.”
4. Be honest about how different you look now
If you’ve:
- Changed hair color dramatically
- Grown or shaved a beard
- Started/stopped wearing glasses
- Gained or lost a lot of weight
…consider regenerating your AI virtual headshots to reflect your current appearance. It lowers friction in interviews when you walk into a room and look like the person on your profile.
5. Reuse smartly across all your professional touchpoints
Once you have 3–5 great AI virtual headshots, use them consistently:
- LinkedIn profile photo
- CV / resume header
- Email signature (small 80–120px version)
- “About” page on your website
- Speaker bios, podcast one-sheets, media kits
Consistency builds recognition. HeadshotVIP’s style-consistent batches are especially helpful if you’re a founder or creator who appears on many platforms.
AI virtual headshot tools vs traditional photography (and where HeadshotVIP fits)
To decide whether to go full AI, full photographer, or hybrid, it helps to look at the trade-offs side by side.
Quick comparison
| Feature / Need | DIY AI in design tools (e.g., Canva) | General AI headshot platforms | Traditional photographer | HeadshotVIP |
|---|---|---|---|---|
| Cost (single person) | Low / freemium | Medium | Highest | Low–Medium |
| Time to first result | Minutes | 15–120 minutes | Days/weeks to schedule & edit | Minutes–1 hr |
| Requires learning a tool | Low | Medium | Low (but you must show up) | Low |
| Realism & identity match | Medium | High (varies by tool) | Very high | High |
| Business-focused presets | Limited | Mixed (some dating/glamour) | Depends on photographer | Strong |
| Output optimized for LinkedIn/CV | Partially | Sometimes | Depends on brief | Yes |
| Team-wide visual consistency | Hard | Mixed team features | Hard & expensive | Yes |
| Privacy control | Depends on vendor | Depends on vendor | Depends on contract | Privacy-focused |
Where HeadshotVIP sits:
- For individuals: a focused, low-friction way to get business-grade AI virtual headshots without learning complex editing tools or explaining your job context to a photographer.
- For teams and companies: a scalable way to get matching headshots across your whole org, something even in-person shoots struggle to standardize.
If you later need ultra-custom lifestyle images (e.g., you with your product, on stage, in a specific office), you can always book a photographer. But for 80–90% of LinkedIn and bio use cases, a well-executed AI virtual headshot is more than enough.
FAQ: AI virtual headshots for business profiles
Q1: Are AI virtual headshots really acceptable on LinkedIn?
Yes—if they’re realistic and honest. Recruiters generally don’t care whether a headshot came from a camera or an AI pipeline; they care that they can recognize you and that you look professional. Where people get into trouble is using obviously fake, hyper-smoothed, or “plastic” images. Tools like HeadshotVIP focus on realistic business styles, which pass the quick “does this look like a normal photo?” test.
Q2: How many AI virtual headshots do I actually need?
For most professionals, aim for 3–5 solid images:
- Primary LinkedIn headshot (square crop)
- CV/resume headshot (clean, neutral background)
- Website / portfolio hero image (slightly wider crop)
4–5. Optional variations for speaker bios, podcasts, or more relaxed “about” pages
HeadshotVIP will usually generate a larger batch; treat it like an AI photoshoot and pick your strongest few.
Q3: What if my selfies are old or low-quality?
AI can’t invent facial detail that simply isn’t there. If your best photos are:
- Grainy, dark, or heavily filtered
- From many years ago
- Cropped from group shots
…you’ll likely end up with mediocre results, no matter which tool you use. In that case, take 10–15 new selfies using the preparation tips above (good light, simple background, neutral expression), then rerun them through HeadshotVIP or your chosen tool.
Summary
You don’t need a studio, a $250 photographer, or a DSLR to get a sharp, credible business headshot anymore. In 2025, the fastest path is to create an AI virtual headshot that looks like you on a great day and fits what hiring managers are used to seeing on LinkedIn.
The key steps are:
- Start with well-lit, clean, varied selfies
- Use a business-focused generator like HeadshotVIP instead of generic avatar tools
- Choose styles that match your industry norms and personal brand
- Keep edits subtle and honest, and reuse your best 3–5 shots across every professional channel
HeadshotVIP sits in the sweet spot between generic AI art tools and costly photoshoots: fast, business-oriented, identity-consistent, and team-friendly.
Try HeadshotVIP Now:
- Starter: from $6.99 – ideal for one-time LinkedIn & CV refresh
- Professional: from $9.99 – more styles, higher resolution, better for creators and founders