Create an AI professional headshot for LinkedIn (2025 guide)
Create an AI professional headshot for LinkedIn (2025 guide)
If your LinkedIn photo is a blurry crop from a wedding, you’re not alone. Traditional headshot sessions are expensive, time‑consuming, and awkward. The good news: AI can now give you a studio‑quality, LinkedIn‑ready headshot from selfies you already have—if you do it right.
This 2025 guide walks you through a non‑technical, step‑by‑step workflow to create an AI professional headshot specifically for LinkedIn using tools like HeadshotVIP. You’ll learn how to pick the right photos, choose styles and backgrounds, crop for LinkedIn, and even A/B test which photo performs best.

Why your LinkedIn headshot matters (and how AI fits in)
Your LinkedIn headshot is often the first impression a recruiter, client, or investor gets of you. LinkedIn’s own research has shown that profiles with a clear, professional photo get:
- More profile views
- More connection requests
- More messages from recruiters
At the same time:
- A good photographer can cost $200–$400+ per session
- Scheduling, getting ready, and commuting can take half a day
- You might only get a handful of usable shots
AI tools like HeadshotVIP, Canva’s LinkedIn headshot generator, and services such as HeadshotPro emerged to fix this. They:
- Turn ordinary selfies into AI‑generated headshots
- Fix lighting, background, and sharpness
- Offer business‑focused styles (corporate, startup, executive, creative)
But results still depend heavily on:
- The quality of your input photos
- The style and background you choose
- How well you crop and optimize for LinkedIn
The rest of this guide focuses on getting those parts right.
What a great AI professional headshot for LinkedIn looks like
Before you open any tool, get clear on the goal. A strong AI professional headshot for LinkedIn usually checks these boxes:
Looks like you (on a good day)
- Realistic skin texture (not plastic or over‑filtered)
- Same eye color, facial structure, and hair type
Clear, professional framing
- Face centered, eye line around the top third of the frame
- Head and upper shoulders visible
- No heavy crops from group photos
Neutral, distraction‑free background
- Plain light tones, subtle gradient, or blurred office setting
- No busy patterns, cluttered rooms, or heavy filters
Clean lighting and contrast
- Face evenly lit (no harsh shadows or blown‑out highlights)
- Good separation from the background
Appropriate expression and clothing
- Relaxed, confident expression (soft smile works best)
- Business‑appropriate outfit for your industry
AI tools can handle background, lighting, and “studio” feel. You still control identity, expression, and overall vibe.
Method 1: Using HeadshotVIP (Recommended)
Use case:
- Job seekers updating LinkedIn and resumes
- Freelancers and founders building a personal brand
- Remote teams who need consistent, LinkedIn‑ready headshots at scale
HeadshotVIP is built specifically to create business headshots optimized for LinkedIn, CVs, and company “About” pages.
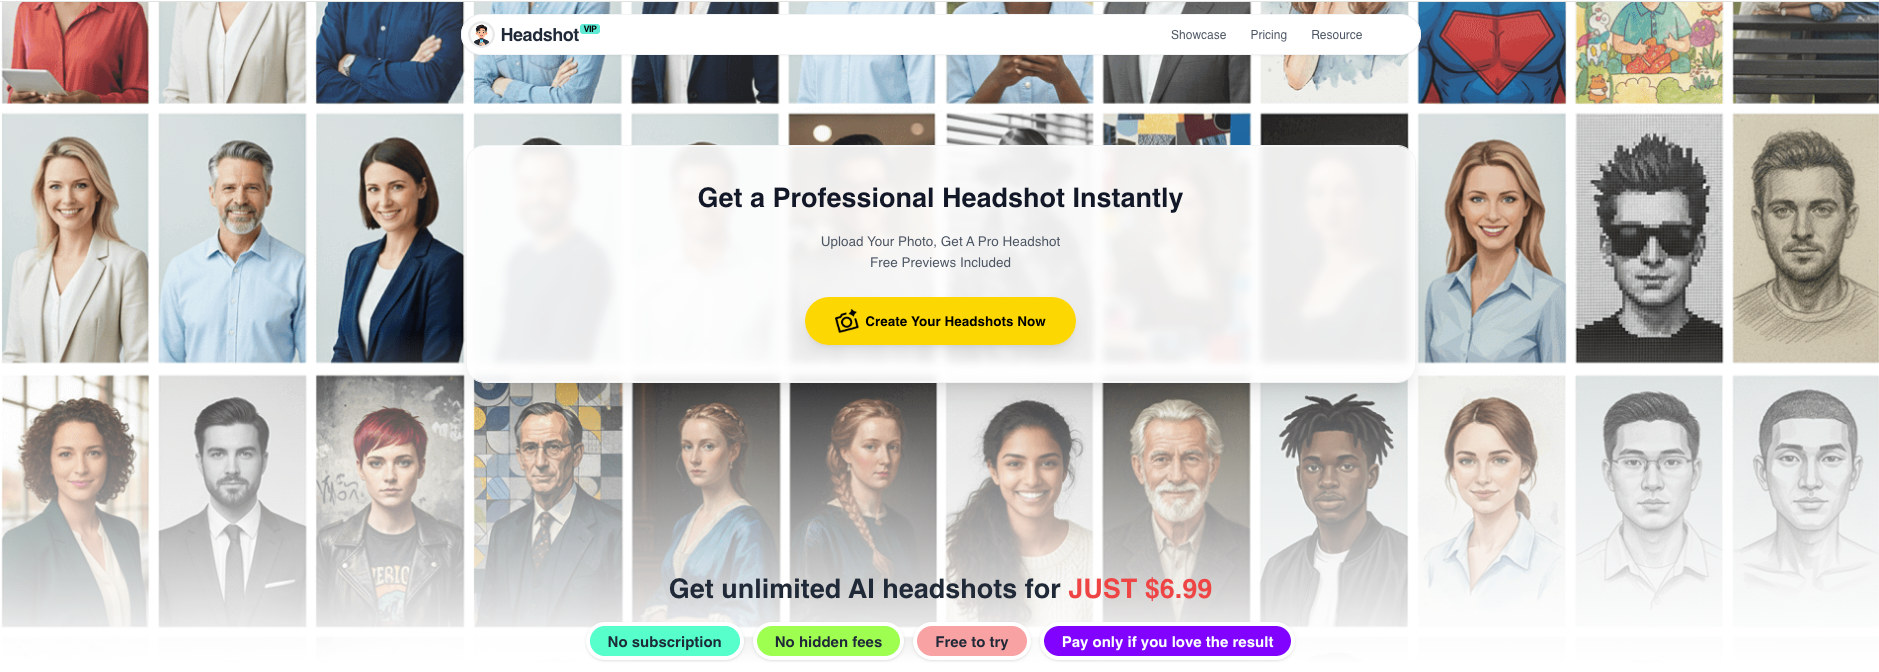
Alt: HeadshotVIP AI professional headshot generator interface showing upload and style selection
Step 1: Get your source selfies ready
Results from any AI headshot generator (including HeadshotVIP) are only as good as your inputs.
To get the best LinkedIn headshot, gather:
- 8–15 clear photos of yourself
- Mix of front and slight 3/4 angles
- At least some with neutral or soft smile
- Photos in good, natural light (near a window is ideal)
Avoid:
- Heavy makeup or filters (FaceApp, Snapchat, beauty filters)
- Sunglasses, hats, masks, or anything blocking your face
- Group photos where your face is tiny or cropped
- Very dark, back‑lit selfies
You don’t need professional photos—smartphone selfies in good light work great.
Step 2: Create your HeadshotVIP account
- Go to https://headshot.vip.
- Sign up with your email or social login.
- Choose a plan:
- Starter – best if you just need 1–2 strong LinkedIn headshots
- Professional – more styles plus higher‑resolution outputs
- Team / Business – if you’re generating consistent headshots for a group
You can start small, then upgrade later if you want more styles or shots.
Step 3: Upload your photos correctly
Inside your HeadshotVIP dashboard:
- Click “Create headshots” or similar.
- Upload your 8–15 best selfies.
- Make sure:
- Your face is fully visible in each photo
- Lighting across photos is reasonably consistent
- You include at least a couple of straight‑on shots
Why this matters: HeadshotVIP uses advanced facial recognition and identity consistency modeling. More varied—but clear—angles help it understand your face and keep results looking like you.
Step 4: Choose a LinkedIn‑ready style
HeadshotVIP offers multiple business‑focused styles, such as:
- LinkedIn – clean, neutral background, soft lighting
- Corporate – sharper, more formal look
- Startup / Tech – slightly more relaxed and modern
- Executive – confident, polished, high‑contrast portraits
- Creative – a bit more personality and color
For most people, “LinkedIn” or “Corporate” is a good starting point.
Tips:
- If you’re in finance, law, consulting → lean corporate/executive.
- If you’re in tech, startups, product, marketing → LinkedIn or startup styles.
- If you’re a designer, creator, artist → consider creative but still clean.
Step 5: Pick background and crop ratios with LinkedIn in mind
HeadshotVIP is optimized for professional platforms, so you’ll typically see output ratios like 1:1 or 4:5, which work well on LinkedIn.
For LinkedIn:
- Use 1:1 square or 4:5 vertical (LinkedIn will crop it into a circle).
- Choose backgrounds like:
- Soft gradient light gray / off‑white
- Subtly blurred office or co‑working space
- Soft blue tones (often perform well in feeds)
Avoid:
- Heavy textures or strong patterns
- Bright neon colors behind you
- Busy cityscapes or dramatic scenes
Step 6: Generate your AI headshots
Once your photos, style, and background are set:
- Confirm your selections.
- Hit Generate.
- Let the AI process your images (usually a short wait, depending on plan and queue).
Behind the scenes, HeadshotVIP:
- Reconstructs lighting and background
- Cleans noise, sharpens facial features
- Ensures identity consistency across multiple outputs
You’ll receive a batch of varied yet coherent AI professional headshots.
Step 7: Review and shortlist the best options
Open your results and quickly scan for:
- Likeness – Does it actually look like you?
- Expression – Do you look approachable and confident?
- Details – Watch for extra teeth, oddly shaped ears, or strange jewelry; discard anything uncanny.
Create a shortlist of 3–5 candidates that:
- Look the most like you
- Match your industry vibe
- Have clean backgrounds and flattering lighting
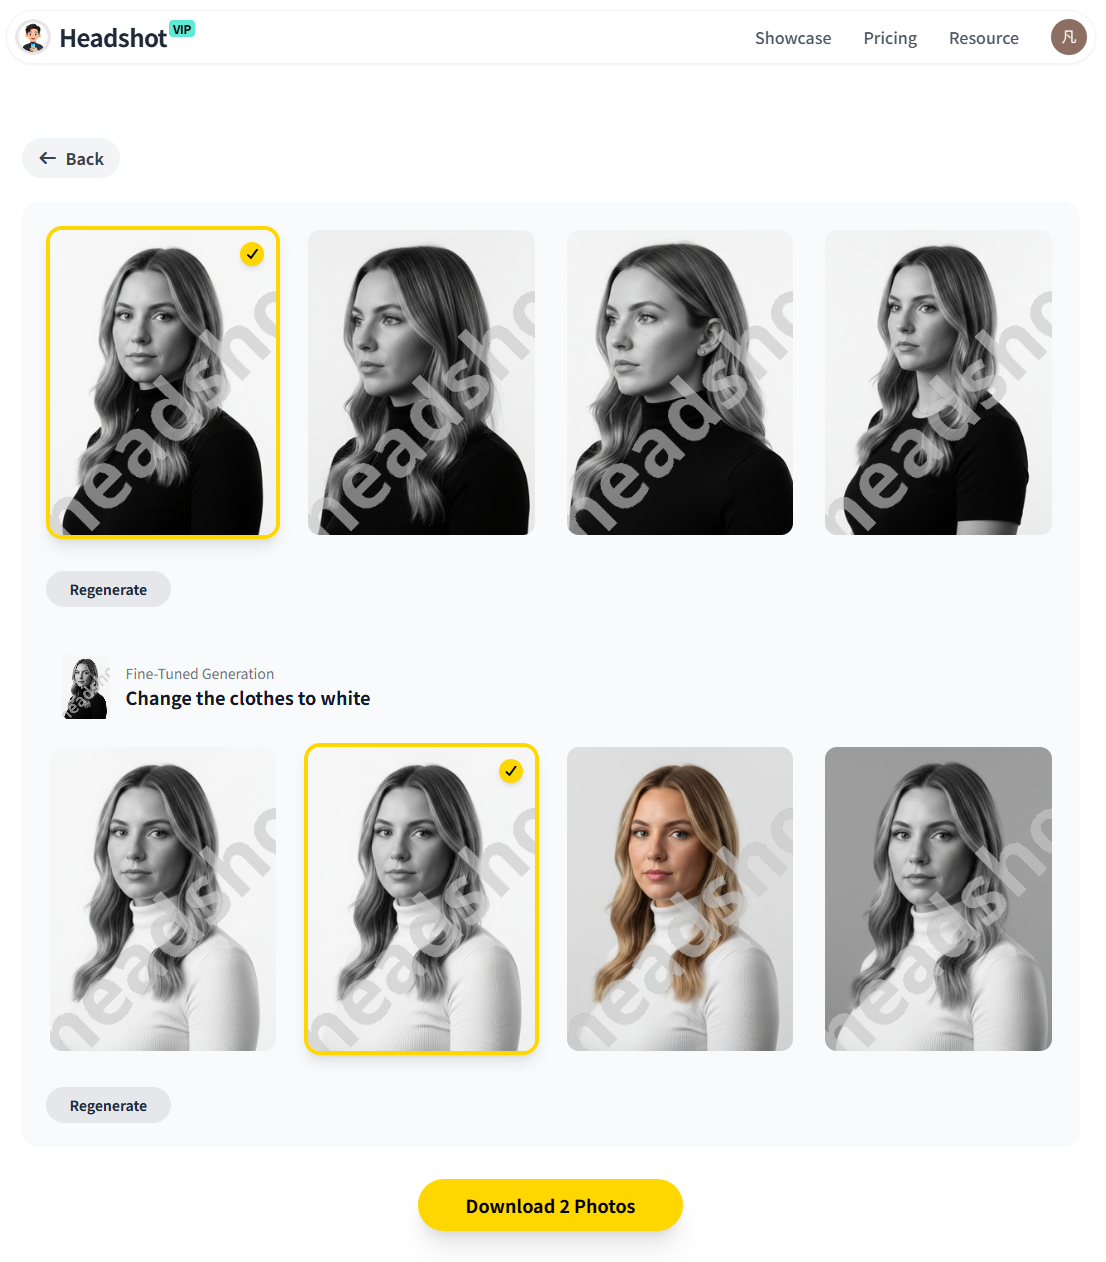
Alt: HeadshotVIP AI professional headshot results suitable for LinkedIn profiles
Step 8: Fine‑tune (if needed)
HeadshotVIP focuses on generating ready‑to‑use headshots, but like any AI tool it has limits:
- You get limited manual retouching compared to a traditional photographer.
- Pose control is not as granular as directing a live shoot.
If you want small tweaks:
- Slightly adjust brightness/contrast and crop using any photo editor.
- Maintain realism: avoid over‑smoothing skin or changing your face shape.
Step 9: Export the final image for LinkedIn
When you’re happy with 1–2 final shots:
- Download in high resolution (JPG or PNG).
- Keep a master copy at full size.
- Optionally export a cropped 1:1 version specifically for LinkedIn.
HeadshotVIP’s outputs are already optimized for:
- LinkedIn profile picture
- Resume / CV
- Company website / About page
So you typically don’t need heavy editing.
Step 10: Upload to LinkedIn and check the crop
On LinkedIn:
- Go to your profile.
- Click your photo → Add photo / Edit photo.
- Upload your chosen HeadshotVIP headshot.
- Adjust zoom and position so:
- Your face is centered within the circular frame
- Your eyes sit slightly above the center
- Your shoulders are visible but not dominating
Use LinkedIn’s basic filters sparingly (or not at all) to avoid the “over‑edited” look.
Why use HeadshotVIP for LinkedIn headshots?
Advantages:
- ✅ LinkedIn‑focused styles: Styles and output ratios tuned for professional platforms.
- ✅ Identity consistency: Advanced modeling to keep you looking like yourself across outputs.
- ✅ Professional backgrounds: Office, neutral, and modern setups suitable for resumes and company sites.
- ✅ Team‑ready: Style‑consistent batch generation for founders and remote teams who want unified branding.
- ✅ Privacy‑focused: Images are processed with privacy in mind; no reselling your data.
Limitations (honest view):
- Final quality still depends on your original selfies. Poor lighting or heavy filters reduce realism.
- You don’t have the same minute pose and lighting control as a live photographer.
For most job seekers and professionals, though, HeadshotVIP delivers “photographer‑level enough” results at a fraction of the cost and time.
Method 2: Alternative AI LinkedIn headshot generators
If you’re exploring the broader landscape, here’s how other popular options generally compare.
Option A: Canva’s free LinkedIn headshot generator
Canva offers a Profile Photo / AI headshot app inside its editor.
How it works (in brief):
- Open Canva → search and open the Profile Photo app.
- Upload a selfie, choose your gender identity.
- Canva’s AI adjusts lighting, background, and sharpness.
- You can further tweak with Canva tools (background remover, Magic Edit, filters).
Pros:
- ✅ Free credits (good for quick tests).
- ✅ Built‑in photo editor with filters and background tools.
- ✅ Great if you already design resumes, banners, or posts in Canva.
Cons:
- ❌ Outputs are general‑purpose, not always tuned specifically for LinkedIn.
- ❌ Less control over business‑focused styles and consistency.
- ❌ Quality may vary; sometimes looks more like a stylized edit than a studio portrait.
Option B: Dedicated AI headshot services (e.g., HeadshotPro, BetterPic, Proshoot, Aragon AI)
Several specialized services focus on AI business headshots. A reviewer who tested 30+ tools found that tools like BetterPic, Proshoot, Aragon AI, and HeadshotPro often produce very realistic results, sometimes indistinguishable from real photos.
Typical workflow:
- Upload 10–20 selfies.
- Pick general style / outfits / environments.
- Wait 1–2 hours.
- Get 40–100+ AI headshots to choose from.
Pros:
- ✅ Very high realism for business portraits.
- ✅ Large number of shots (often 80–120+).
- ✅ Options for outfits and backdrops (office, conference, etc.).
Cons (vs. HeadshotVIP):
- ❌ Often more expensive if you just need 1–2 LinkedIn photos.
- ❌ Feature sets vary; not all are tuned to LinkedIn‑first workflows.
- ❌ Some tools produce a few uncanny or off‑likeness shots you need to filter out.
Comparison: HeadshotVIP vs Canva vs generic AI headshot tools
Here’s a simple side‑by‑side view for LinkedIn use cases:
| Feature / Need | Canva Profile Photo | Generic AI headshot tools (e.g. HeadshotPro) | HeadshotVIP |
|---|---|---|---|
| Primary focus | General social profile | Business portraits in bulk | LinkedIn & professional headshots |
| Best for | Casual users, quick edits | Teams, very large batches | Job seekers, professionals, teams |
| LinkedIn‑specific optimization | Basic | Varies by tool | Yes (styles & ratios) |
| Control over business style | Limited | Medium–high (depends on tool) | Multiple business‑focused styles |
| Background options | Editable, but generic | Many (office, stage, etc.) | Professional, distraction‑free |
| Identity consistency | Good for single edits | Good, but can vary between tools | Core AI feature |
| Team / brand consistency | Manual design work | Strong in some tools | Style‑consistent batch generation |
| Price point for individuals | Free + paid upgrades | Medium–high | Starter and Professional tiers |
| Technical complexity | Very easy | Easy, but more steps | Simple upload → generate → download |
If your main goal is “one great AI professional headshot for LinkedIn”, a LinkedIn‑focused tool like HeadshotVIP keeps the process fast and on target.
Pro tips to make your AI LinkedIn headshot perform better
Once you’ve generated a solid AI headshot, you can still gain an edge with a few practical tweaks.
1. Match your headshot to your industry
Corporate / finance / legal
- Dark blazer, light shirt, minimal jewelry
- Neutral or cool office background
Tech / startup / product
- Smart‑casual shirt or sweater
- Slightly softer lighting, modern office or plain background
Creative / marketing / content
- Subtle color in clothing or background
- Still avoid anything too busy or gimmicky
The goal is to look like a credible version of yourself that fits what your target companies expect.
2. Use A/B testing on LinkedIn
You can’t run formal split tests inside LinkedIn, but you can do a simple manual test:
- Shortlist 2–3 AI headshots from HeadshotVIP.
- Use one as your profile photo for 2–3 weeks.
- Track:
- Profile views
- Connection requests
- Inbound messages
Then switch to the next photo for another 2–3 weeks and compare. Over time you’ll see which style gets more engagement.
3. Keep it honest and realistic
There’s an ongoing debate about AI photos in professional contexts. To stay on the safe side:
- Don’t use AI to change your age, ethnicity, or key facial features.
- Aim for “me on my best day,” not “me as a different person.”
- If you’re asked, be comfortable saying:
“It’s an AI‑enhanced headshot based on my real photos.”
Most recruiters care more about clarity and professionalism than the exact process used.
4. Refresh your headshot regularly
Your face and style change over time. As a rule of thumb:
- Update your LinkedIn headshot every 1–2 years, or
- Whenever you undergo a major shift (new hairstyle, glasses, personal brand shift).
Because AI tools like HeadshotVIP are fast and affordable, it’s easy to refresh without booking another shoot.
Frequently asked questions about AI professional headshots for LinkedIn
Q1: Are AI professional headshots allowed on LinkedIn?
Yes. LinkedIn doesn’t forbid AI‑generated photos as long as they truthfully represent you and don’t violate their community guidelines. The problems start when images are misleading or heavily manipulated. Stick to realistic, identity‑accurate headshots and you’re fine.
Q2: How many photos do I need to upload to get good AI results?
Most AI headshot generators, including HeadshotVIP, work best with 8–15 clear photos. More variety in angle and lighting (while keeping your face clearly visible) helps the AI understand your features and produce consistent, realistic headshots. A handful of great photos beats 50 low‑quality ones.
Q3: What if I don’t like any of my AI headshots?
First, check your input photos: are they dark, filtered, or inconsistent? If yes, retake a set of well‑lit, neutral selfies and try again. With some tools, you may get a large batch where only a portion are truly usable—that’s normal. HeadshotVIP’s goal is to maximize usable shots, but if you still end up unhappy, review the tool’s refund or re‑run policies and contact support.
Summary
You don’t need a $300 studio session to get a professional LinkedIn photo anymore. With the right inputs and a LinkedIn‑focused tool, you can create an AI professional headshot that looks realistic, credible, and on‑brand—often in under an hour.
In this guide, you learned:
- What makes a strong LinkedIn headshot (realistic, well‑lit, distraction‑free).
- How to use HeadshotVIP step by step: from gathering selfies to uploading, choosing styles, generating, and exporting.
- How alternative tools like Canva and other AI generators compare.
- Practical tips for A/B testing, industry‑specific styling, and staying honest with AI.
HeadshotVIP focuses on LinkedIn‑ready, business‑focused headshots, with fast generation, identity consistency, and privacy‑conscious processing—ideal for job seekers, professionals, and teams.
Try HeadshotVIP Now:
- Starter: $6.99 – perfect if you just need a strong LinkedIn photo
- Professional: $9.99 – more styles and higher‑resolution outputs
Related Articles
Current Date: 2026-01-08